View All Posts
read
Want to keep up to date with the latest posts and videos? Subscribe to the newsletter
HELP SUPPORT MY WORK: If you're feeling flush then please stop by Patreon Or you can make a one off donation via ko-fi
#APP DEVELOPMENT #AUGMENTED REALITY #AVCAPTURESESSION #CAMERA #CODING #DEMO CODE #HEART RATE APP #IOS APP

I’ve had a few emails asking for information on how my app Heart Rate - Free works.

There’s nothing particularly clever about it, it just uses the camera to pick up the slight change in the colour of the light coming from the flash as the blood flows in and out of the finger.

You can make a few modifications to the code posted in the Augmented Reality Post or download the demo code.

Setting up the capture session is pretty much the same as usual. The main differences are that we don’t need to preview the image (it’s not very interesting to look at…) and that we need to turn on the flash to illuminate the finger.

// switch on the flash in torch mode
if([camera isTorchModeSupported:AVCaptureTorchModeOn]) {
 [camera lockForConfiguration:nil];
 camera.torchMode=AVCaptureTorchModeOn;
 [camera unlockForConfiguration];
}

We’ll also set the frame size to low as we don’t need high resolution images:

[session setSessionPreset:AVCaptureSessionPresetLow];

The capture setup code looks like this now:

// Create the AVCapture Session
session = [[AVCaptureSession alloc] init];
 
// Get the default camera device
AVCaptureDevice* camera = [AVCaptureDevice defaultDeviceWithMediaType:AVMediaTypeVideo];
if([camera isTorchModeSupported:AVCaptureTorchModeOn]) {
 [camera lockForConfiguration:nil];
 camera.torchMode=AVCaptureTorchModeOn;
 [camera unlockForConfiguration];
}
// Create a AVCaptureInput with the camera device
NSError *error=nil;
AVCaptureInput* cameraInput = [[AVCaptureDeviceInput alloc] initWithDevice:camera error:&error];
if (cameraInput == nil) {
 NSLog(@"Error to create camera capture:%@",error);
}
 
// Set the output
AVCaptureVideoDataOutput* videoOutput = [[AVCaptureVideoDataOutput alloc] init];
 
// create a queue to run the capture on
dispatch_queue_t captureQueue=dispatch_queue_create("catpureQueue", NULL);
 
// setup our delegate
[videoOutput setSampleBufferDelegate:self queue:captureQueue];
 
// configure the pixel format
videoOutput.videoSettings = [NSDictionary dictionaryWithObjectsAndKeys:[NSNumber numberWithUnsignedInt:kCVPixelFormatType_32BGRA], (id)kCVPixelBufferPixelFormatTypeKey,
         nil];
// cap the framerate
videoOutput.minFrameDuration=CMTimeMake(1, 10);
// and the size of the frames we want
[session setSessionPreset:AVCaptureSessionPresetLow];
 
// Add the input and output
[session addInput:cameraInput];
[session addOutput:videoOutput];
 
// Start the session
[session startRunning];

In out capture callback we’ll pull out the RGB values from the preview image:

- (void)captureOutput:(AVCaptureOutput *)captureOutput didOutputSampleBuffer:(CMSampleBufferRef)sampleBuffer fromConnection:(AVCaptureConnection *)connection {
 // this is the image buffer
 CVImageBufferRef cvimgRef = CMSampleBufferGetImageBuffer(sampleBuffer);
 // Lock the image buffer
 CVPixelBufferLockBaseAddress(cvimgRef,0);
 // access the data
 int width=CVPixelBufferGetWidth(cvimgRef);
 int height=CVPixelBufferGetHeight(cvimgRef);
 // get the raw image bytes
 uint8_t *buf=(uint8_t *) CVPixelBufferGetBaseAddress(cvimgRef);
 size_t bprow=CVPixelBufferGetBytesPerRow(cvimgRef);
 // get the average red green and blue values from the image
 float r=0,g=0,b=0;
 for(int y=0; y<height; y++) {
  for(int x=0; x<width*4; x+=4) {
   b+=buf[x];
   g+=buf[x+1];
   r+=buf[x+2];
  }
  buf+=bprow;
 }
 r/=255*(float) (width*height);
 g/=255*(float) (width*height);
 b/=255*(float) (width*height);

 NSLog(@"%f,%f,%f", r, g, b);
}

If we run this and plot the values for red and green (blue is pretty uninteresting as it’s almost zero) we can see that there’s definitely some kind of change when the heart beats:

The peaks in both the red and green values correspond to your pulse. We can combine the values into something a lot more convenient if we convert the RGB values to HSV (hue, saturation, value) and just use the value of hue.

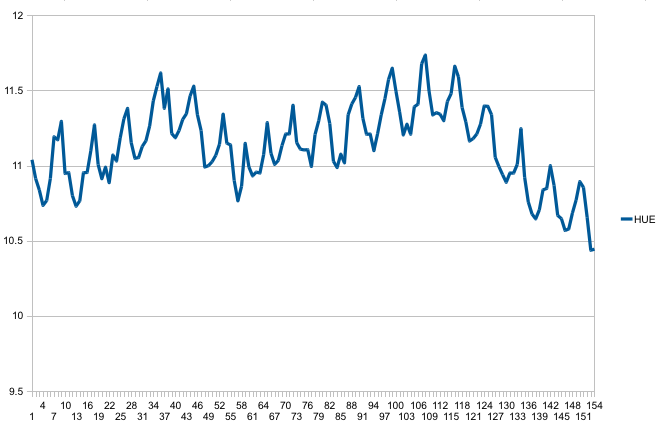
We can now see a definite pattern that corresponds to the heart beat. You’ll probably want to do some filtering on the results from this - I’d suggest running it through a simple notch filter (highpass and lowpass filter) to get rid of DC component and apply a bit of smoothing to isolate the heart beat:

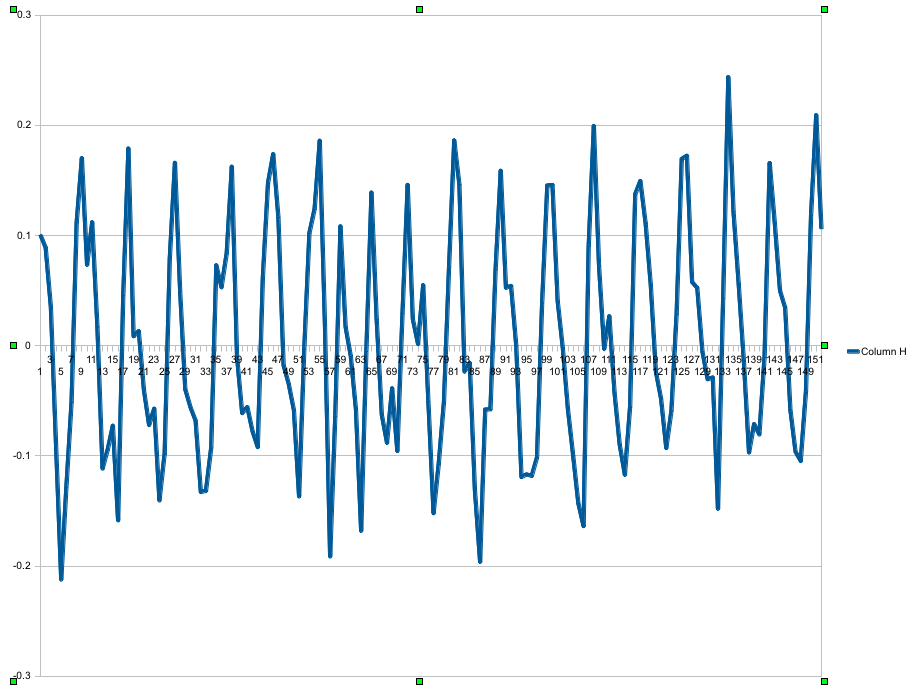
You can then pass these values into whatever mechanism you plan to use to detect and measure the beats.

Here’s the sample project in action:

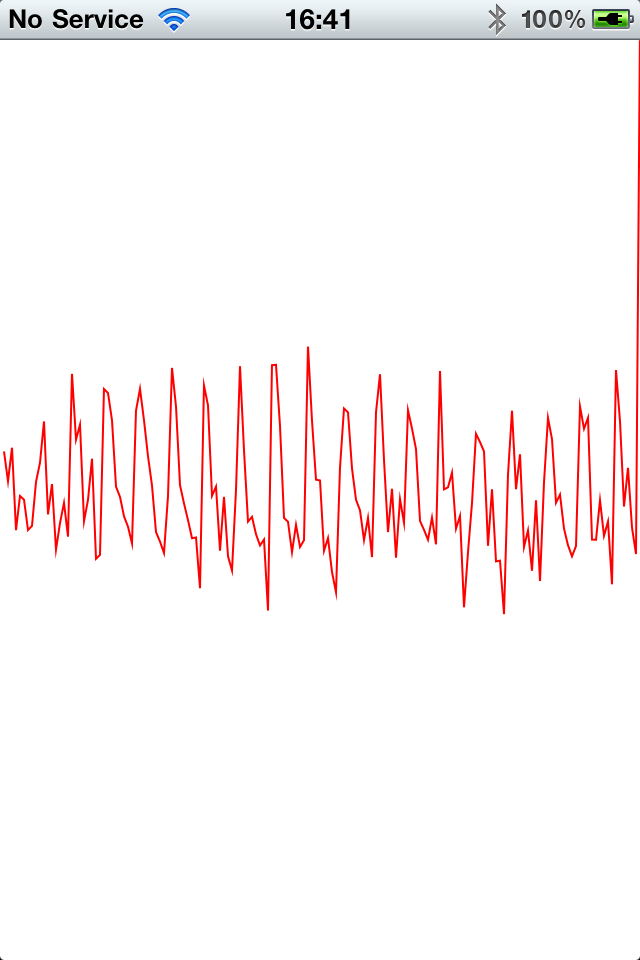
You can download it from here. You’ll need to replace the filtering with something a bit more sensible, the code I’ve put there is purely for demo purposes.

#APP DEVELOPMENT #AUGMENTED REALITY #AVCAPTURESESSION #CAMERA #CODING #DEMO CODE #HEART RATE APP #IOS APP

Related Posts

Heart Rate Free - just released on the iPhone - Just found an iPhone app that creatively measures your heart rate simply using the flash on your phone. Thought I'd try the neat little tool and was fascinated with it. Can't wait to share more on how it works in an upcoming post.
iAds Report - In this post, I'm sharing performance stats from a free Heart Rate app which has been live for just over two weeks, and has been downloaded around 40k-50k times worldwide. It was categorized under Entertainment instead of Health and Fitness which may have affected downloads and advertising revenue. It's been relatively successful and was built with iAds and AdMob adverts. Revenue generated from the US was substantial with fill rates at nearly 50% and an amazing eCPM of almost $30, compared to Admob's $2.2. Despite the revenue's rapid decline correlating with downloads, I believe there may be a strong case for ads in apps.
Augmented Reality on the iPhone - how to - Hey there tech enthusiasts! So, you used to rely on my old methods for employing augmented reality on an iPhone? Well, those days are past. With the release of iOS4, accessing the camera has become a breeze. Check out my latest blog post where I share the specially updated code that works seamlessly with iOS4.
Augmented reality on the iPhone with iOS4.0 - Hey guys! Just updated my earlier blog post on creating Augmented Reality (AR) on iPhones using the new iOS4.0 features. I’ve also moved away from the 'UIGetScreenImage' function as it’s no longer supported. Now, we access the camera using the AV Foundation framework with the help of AVCaptureSession. As always, you're free to download and fiddle with my code available in this blog. Happy Programming!
Raspberry Pi BTLE Device - Just wrapped up the first iOSCon hackathon and had a blast tinkering with my Raspberry Pi, turning it into a full-fledged Bluetooth device in sync with an iPhone app. Used node for setting up and Bleno for creating Bluetooth low energy peripherals. Penned down each step for you to replicate, right from writing strings on my LCD to reading temperatures and getting notified of IR remote button clicks. Ran it on an app store or GitHub test application. Also, explored the Core Bluetooth framework for iOS app creation, for reading and writing data to the Raspberry Pi. Let's keep creating magic with technology!

Related Videos

Augmented Reality iPhone Sudoku Grab - Experience real-time augmented reality capture with the new version of Sudoku Grab! Learn to build your own app with detailed guidance provided in the linked article.
WiFi or BlueTooth - What's the best way to communicate with our things? - Discover the world of smart devices and the wireless connection options available for app developers, such as Bluetooth Low Energy and Wi-Fi. Learn about the history, performance, and challenges of these technologies and how to use them to build successful apps that communicate with hardware.
DIY e-Reader update - ported to the M5Paper - Discover the latest updates on the DIY e-reader project, featuring the sleek M5 paper device with an SD card for storing numerous books, a jog button for navigation, and a crisp display! Check out the Github link and try it out.
Streaming Video and Audio over WiFi with the ESP32 - In this video, we dive into a hardware hack combining several components to create my version of the TinyTV, complete with a remote control, and video streaming over Wi-Fi. We challenge the speed of image display, using different libraries and tweaking performance for optimal results. We explore Motion JPEG or MJPEG to decode and draw images quickly, and even reach about 28 frames per second. We also catered audio using 8-bit PCM data at 16kHz, and deal with syncing both video and audio streams. Finally, we add some interactive elements allowing us to change channels and control volumes, with a classic static animation thrown in for good measure. There's a few hiccups along the way, but that's part of the fun, right?
AI-Powered Coding: GitHub Copilot Writes Arduino Blink Sketch & WiFi Setup - Find out how GitHub Co-Pilot's AI impressively handles a blink sketch and Wi-Fi setup in an Arduino project!
HELP SUPPORT MY WORK: If you're feeling flush then please stop by Patreon Or you can make a one off donation via ko-fi
Want to keep up to date with the latest posts and videos? Subscribe to the newsletter
Blog Logo

Chris Greening


Published

> Image

atomic14

A collection of slightly mad projects, instructive/educational videos, and generally interesting stuff. Building projects around the Arduino and ESP32 platforms - we'll be exploring AI, Computer Vision, Audio, 3D Printing - it may get a bit eclectic...

View All Posts