I finally got the PCBs submitted to PCBWay for manufacture. You can watch a detailed video of the design process with KiCad here:
Or read about it below:
It’s always a bit stressful hitting that final submit button - You never know what you might have messed up.
But generally, everything can be fixed with a bodge wire or two.
I’ve already realised that there are some nice improvements that I could make to the layout and I’ve also made a small mistake which I think is fixable
We’ve got a bit of time before the boards arrive - the good folk at PCBWay are taking a well-deserved break for the Chinese new year.
So I thought it might be interesting to go through how I ended up with my final design and the decisions I’ve made along the way.
First off, what are we building?
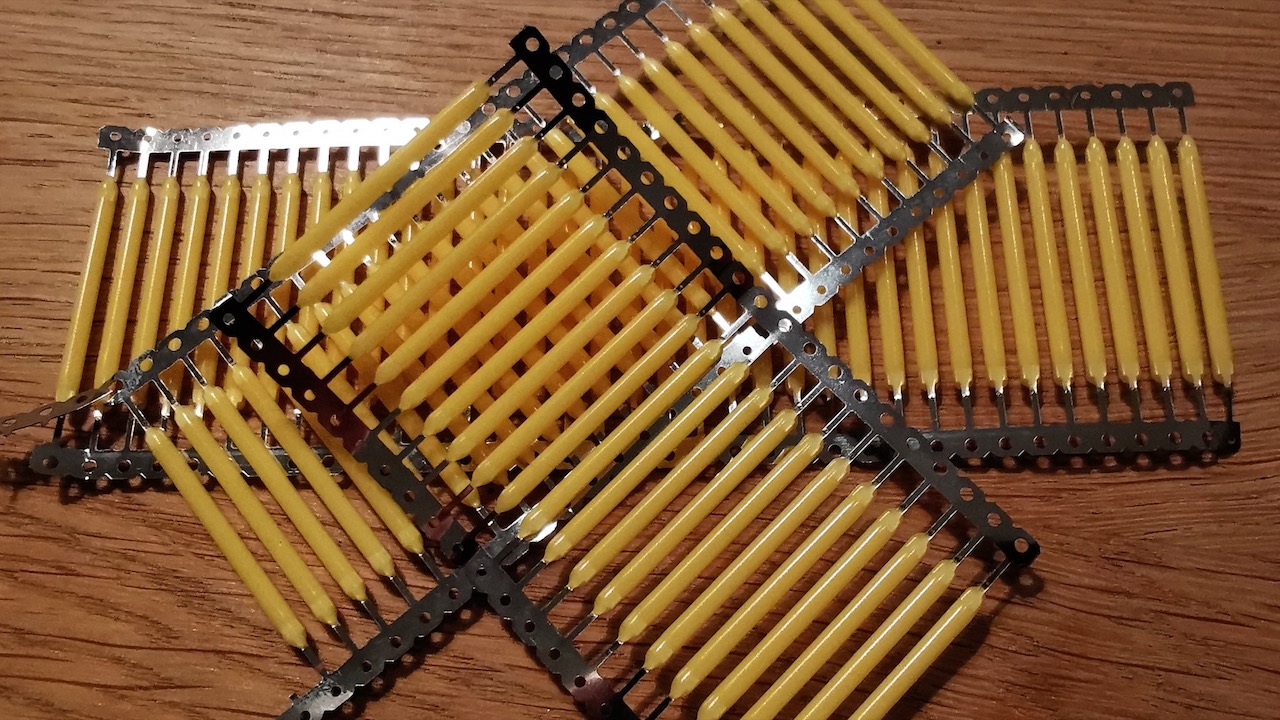
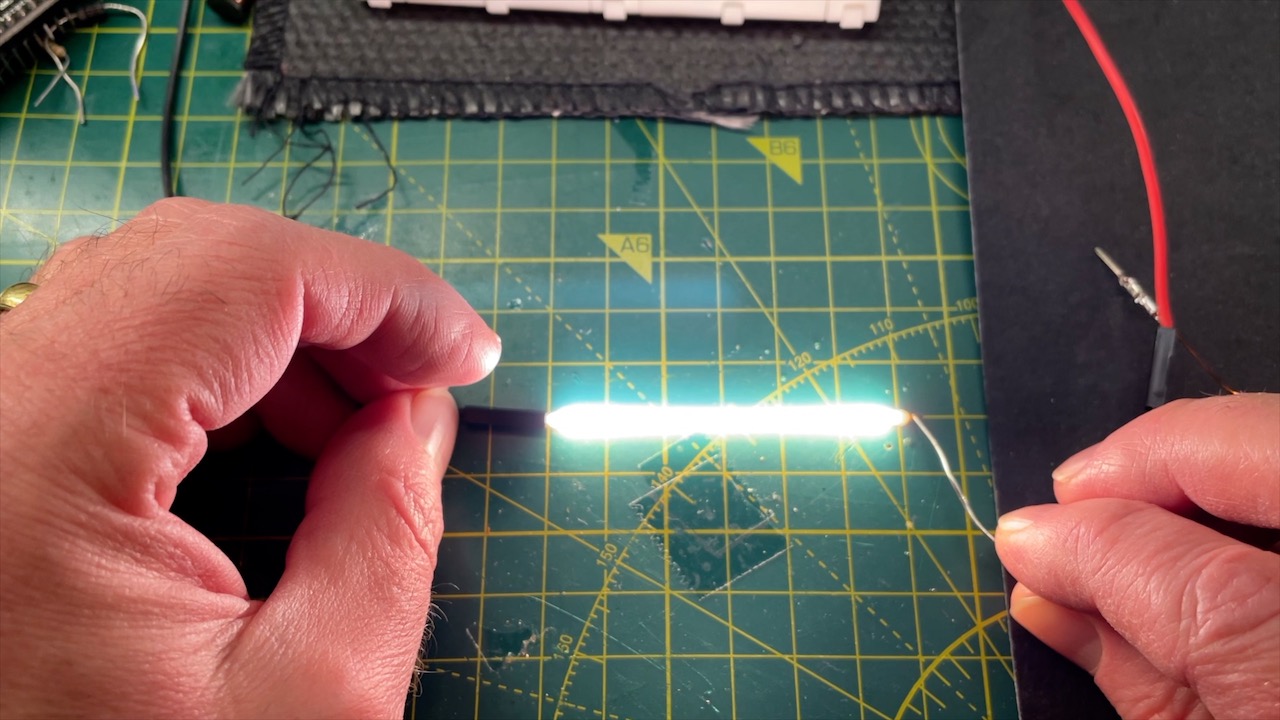
I came across these LED filaments a while back and I thought it might be fun to build a large seven-segment clock with them.
The filaments need quite a high voltage to drive them - I’ve got a video that shows how this is built which you can watch here:
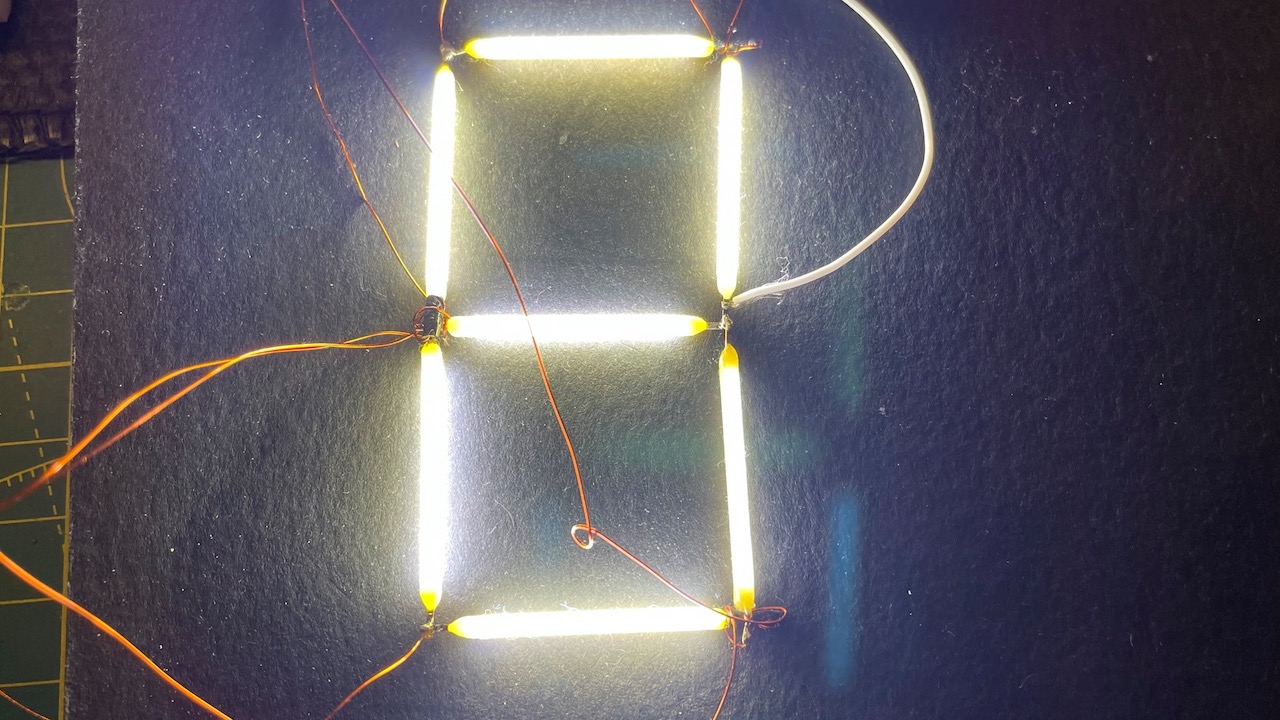
I designed some nice seven-segment modules - another video details the build of these and then got to thinking about how to drive them.
There are of course chips that will drive seven-segment displays - it’s a pretty common requirement (e.g. the MAX6954 chip).
However, they don’t generally support driving segments at 50 volts so I decided to build my own.
As usual, the heart of the system is an ESP32.
There are a couple of things that I wanted to achieve in my design.
- I wanted to minimise the number of pins being used - the ESP32 does have a lot of pins, but it’s surprising how quickly you run out.
- I also wanted to minimise the load on my power supply. We’re boosting our 5v supply up to 50v with a homemade circuit - so I really wanted to minimise the power draw on it and avoid any magic smoke being released.
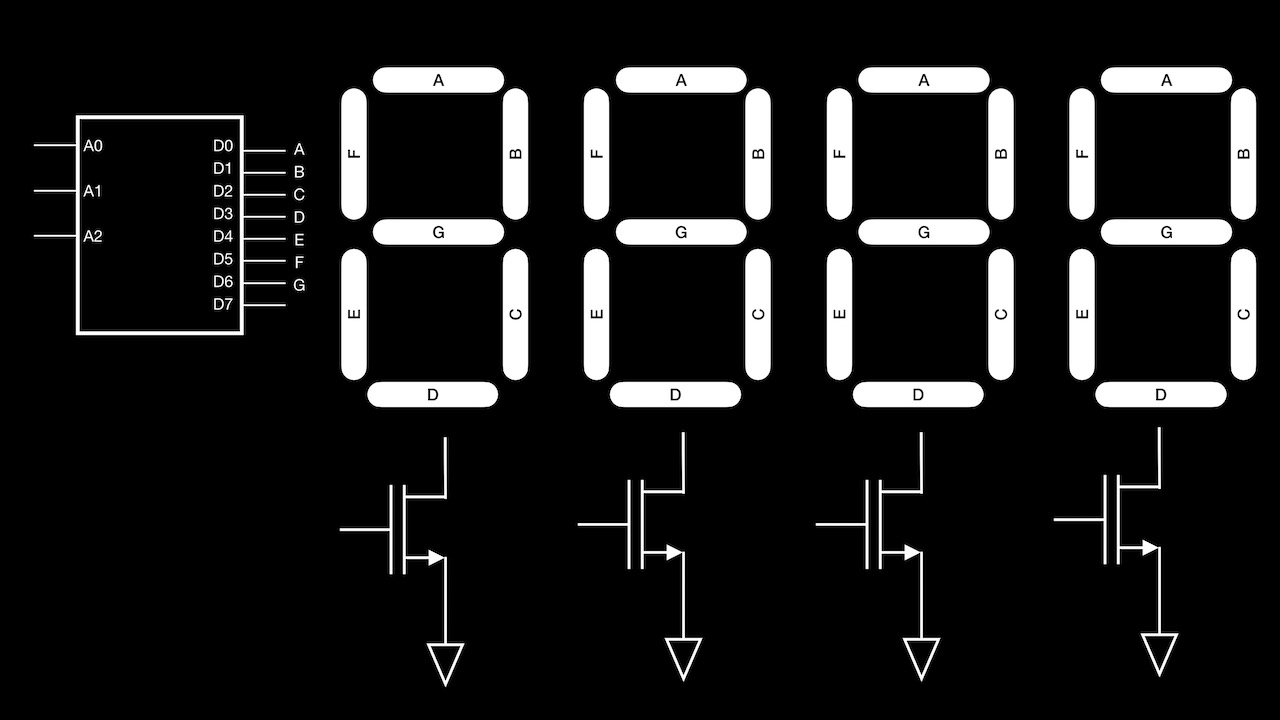
My initial thought was to drive the segments one at a time.
With 3 pins and a demultiplexer, we can potentially control 8 segments.
I also found a nice driver chip - a TBC62783 - that could handle up to 50V on its output.
My plan was to use this to drive each segment’s positive anode and have a common cathode for each digit switched by an n-channel MOSFET.
This would let us connect 4-digits.
We’d then cycle through each segment and each digit in turn.
Do this fast enough and it looks like they are on all the time.
I prototyped this circuit up with a very rough seven segment display and it worked pretty well.
In total, this circuit would need 4 lines to drive the n-channel MOSFETs, and 4 lines to drive the multiplexer - 3 for the address and 1 for the output enable.
After a bit of playing with the step-up power supply, I realised that it could actually deliver enough current to light up 7 segments without getting too hot.
I also realised that the driver chip could deliver up to 150mA per channel - which would be more than enough to light up 7 segments.
At the same time, I came across someone doing a similar project which pointed me in the direction of the TPIC6595 power shift register.
These are 8-bit shift registers with open-drain outputs that can sink up to 250mA.
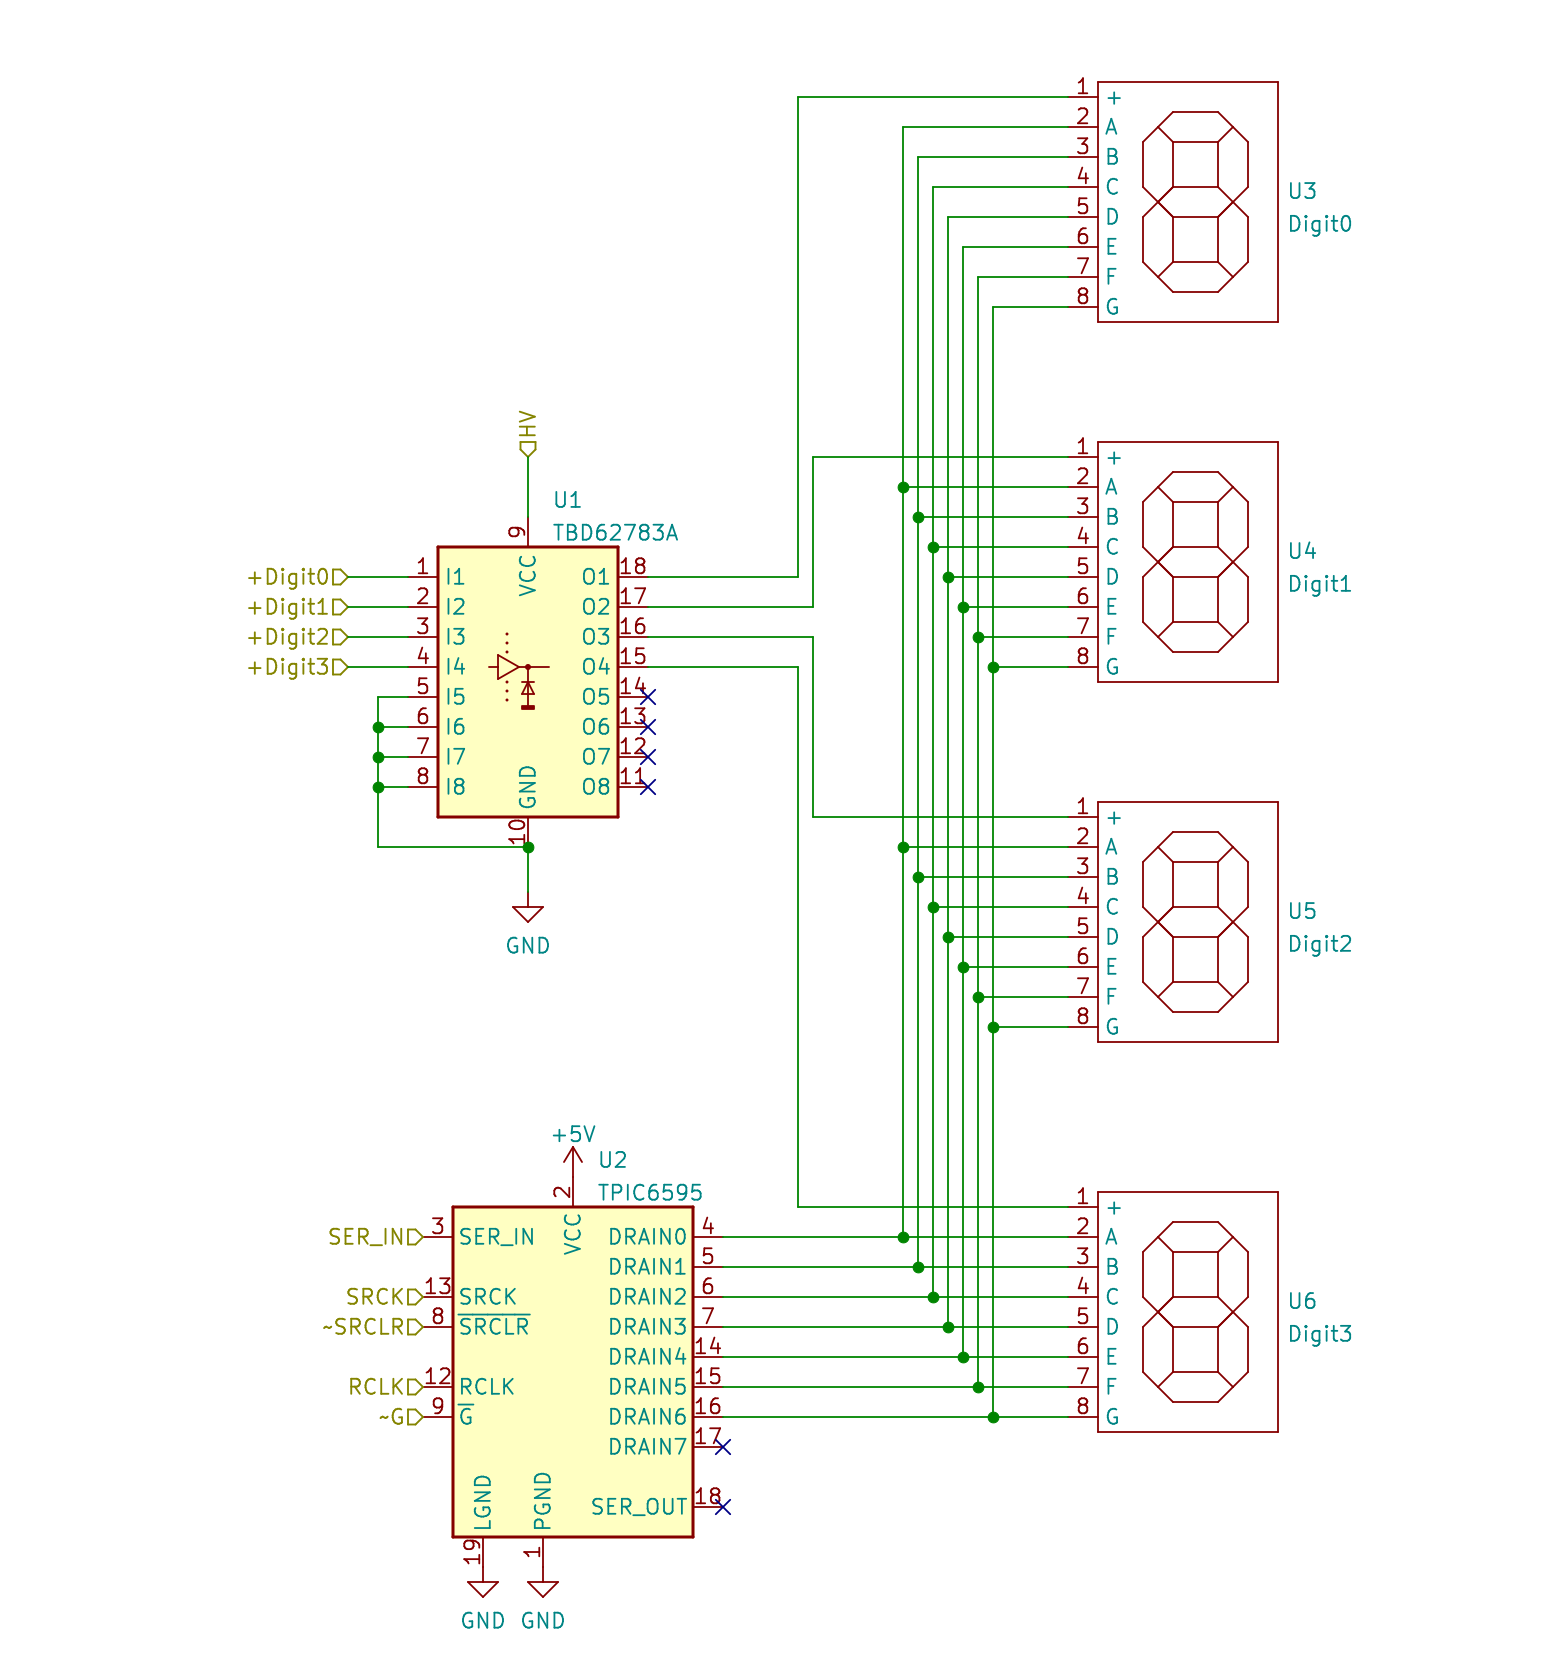
This prompted my new circuit idea with the LED filaments having a common anode driven by the TBC62783 and the cathodes switch by the TPIC6595.
This circuit is quite nice as it supports lighting up multiple segments at once.
Or if we want to go back to only having one segment lit at once we just change the pattern in the shift register.
Each digit is multiplexed by the TBC62783.
We’d need 4 lines for the digits and 5 lines for the shift register.
I was ready to pull the trigger on this circuit and then I came across the 3v LED filaments.
These would let me do away with my high voltage power supply and they are also almost twice as big!
Unfortunately, each filament can take up to 300mA.
Even limiting this to the 250mA the power shift register can take - our high side driver would need to supply almost 2amps to light 7 segments at the same time - which is way too high.
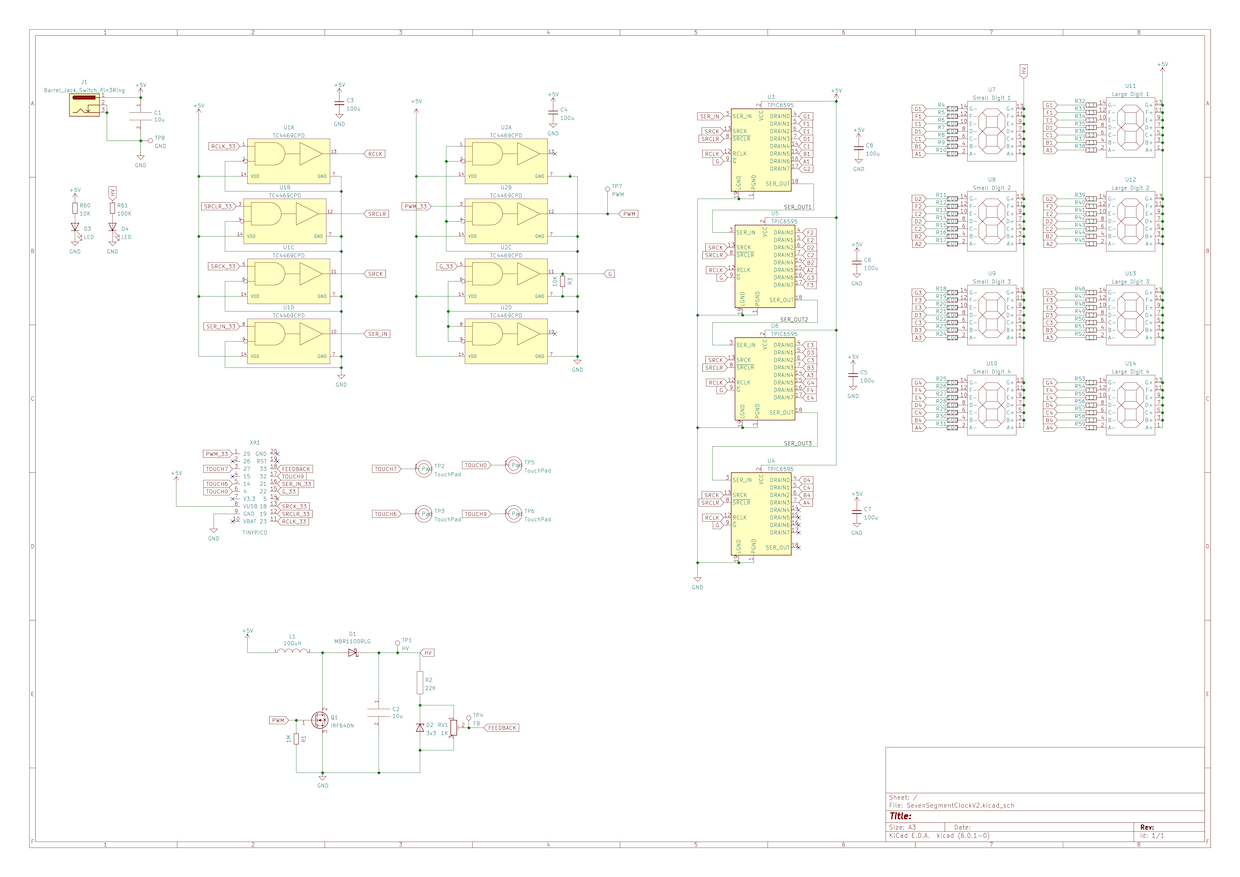
So, here’s my final circuit.
I’ve done away with the digit multiplexing completely and now have 4 power shift registers with each individual segment connected to an output of the shift register.
The anodes of the digits are all common and connected to either the 5v line or the high voltage line depending on which LED filament we are using.
To drive the shift register we just need 5 pins on the ESP32 and we could probably get away with 4 if we didn’t use the enable pin and just had the outputs enabled all the time.
If I need to switch back to multiplexing the LED filaments I can simply load up the shift register with just one output turned on.
We can easily shift out 28 bits quickly enough that you won’t see any flickering.
The only thing I realised quite late on during the schematic design is that these shift registers don’t work at 3.3v - so I need to have some level shifters on the outputs of the ESP32.
I’m already using a TC4469 to drive the power supply MOSFET so I’ve just used a couple of these chips to do the level shifting.
So, I’ve got my PCBs in for manufacture - I’m pretty sure that my seven segment displays are all wired up correctly.
I’ve made these pretty flexible and each segment can be driven independently or you can common up the anodes or cathodes.
There are two versions - one for the smaller high voltage filaments and one for the larger 3v filaments.
On my mainboard I’ve allowed for both sets of digits - so I can have a play with each type and we can see which one we like best.
So, what mistakes have I made?
I think I’ve made at least 3.
The first mistake I’ve made is on the enable line of the shift registers.
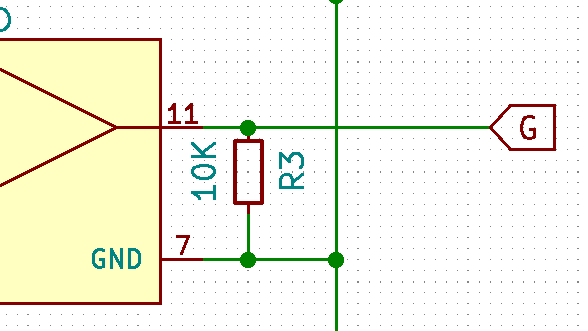
I wanted to make sure that the outputs were not enabled while everything was starting up, so I put a pull-down resistor on the enable line.
The problem is that the enable line is active low - so a pull-down resistor will enable all the outputs.
It should have been a pull-up resistor.
I’ve also put the resistor on the output of the TC4469, it should have been put on the input so that while the ESP32 is starting up the input to the TC4469 is in a known state.
I’ll probably just leave this resistor off when I solder things up and we’ll see what happens.
The second mistake I made was in the layout of the board.
I started off with the shift registers along the top of the board and I was going to put the ESP32 and power supply circuitry along here as well.
I then decided that I wanted some touchpads on the board so needed to make it bigger.
I moved the ESP32 and the power circuit down next to the touchpads.
But I left the shift registers at the top of the board.
This means that the signals to the shift registers have to take quite a roundabout route from the level shifters.
I should have moved the shift register down to below the digits and close to the level shifters.
The third mistake I made was that I added current limiting resistors to both the small and the large digit segments.
I’m not planning on running the 3 volts and the high voltage led filaments at the same time, so I could have used the same resistors for both sets of filaments.
The high voltage current is mostly limited by the output voltage we set with the trimpot - so we can pretty much use any resistor value - they are really only being used to balance the LED filaments.
Anyway, the boards are now being manufactured - they should come through in about 10 days or so and we’ll see soon see what else I got wrong then.
