HELP SUPPORT MY WORK: If you're feeling flush then please stop by Patreon Or you can make a one off donation via ko-fi
We’ve got a few options when developing on the RaspberryPI. We can connect a mouse, keyboard and monitor and treat it like a desktop computer - but it’s not always very convenient.
You can watch a video version of this blog post here:
First off you need a spare mouse, a spare keyboard and a spare monitor - And you need the RaspberryPi close enough that you can plug all this together
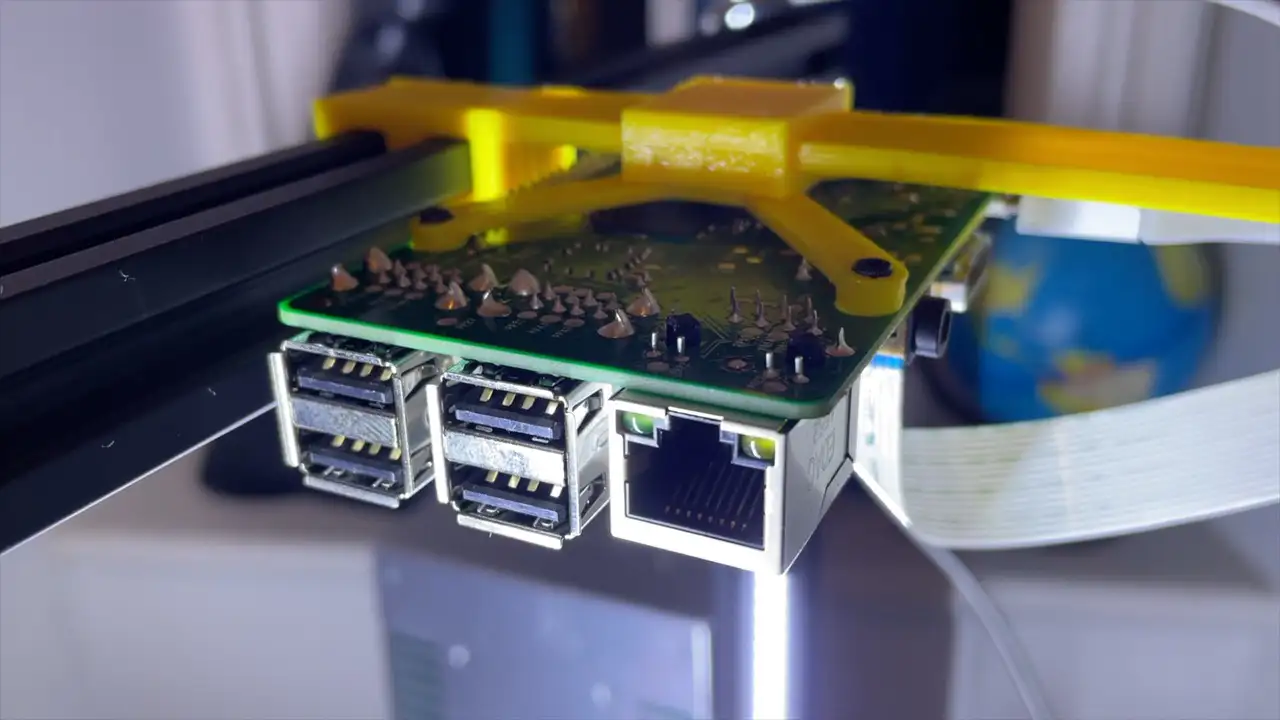
This RaspberryPI is part of my wordle solving robot and it’s connected to my 3D printer. I could plug everything into it, but it’s a bit of a pain and I’d probably end up ripping the sockets off the board.
If you don’t have these spare peripherals you can set the PI up in a headless way and connect to it via SSH.
Once you’re connected then you’ve got access to vim and nano - I’m quite used to using these for making quick edits, but it’s not the most friendly of editors to use.
There are of course more fully functional editors that you can use from the command line, Emacs is particularly powerful.
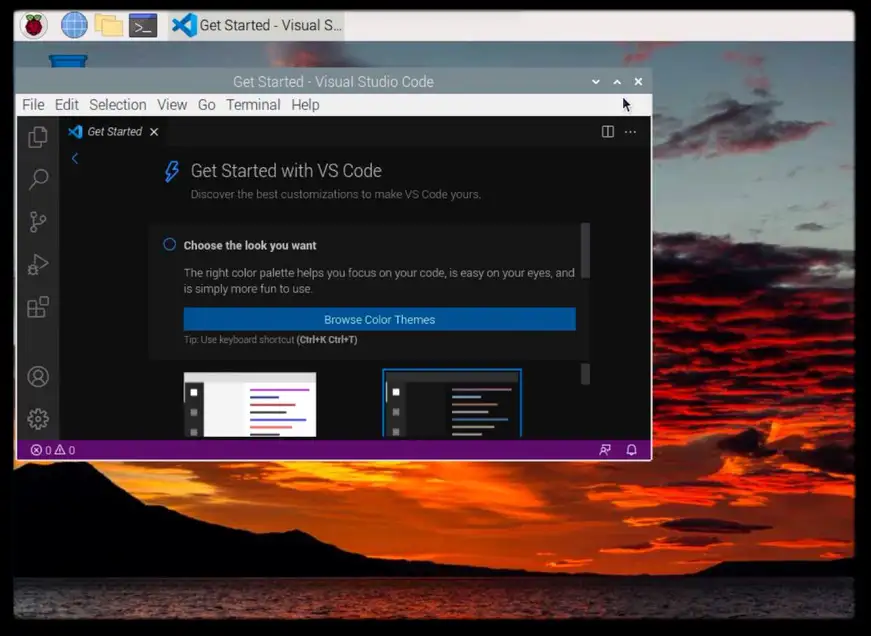
Another option once we’ve got our headless PI up and running and connected to our network is to use VNC - this is quite nice and we get access to the PIs desktop environment.
We can then install an IDE like VSCode and crack on with our development.
This last option is nice, but it’s still a bit annoying to use and we need to have a desktop environment installed and running on our Pi.
There is a much nicer way, and that’s to use VSCode’s remote development features.
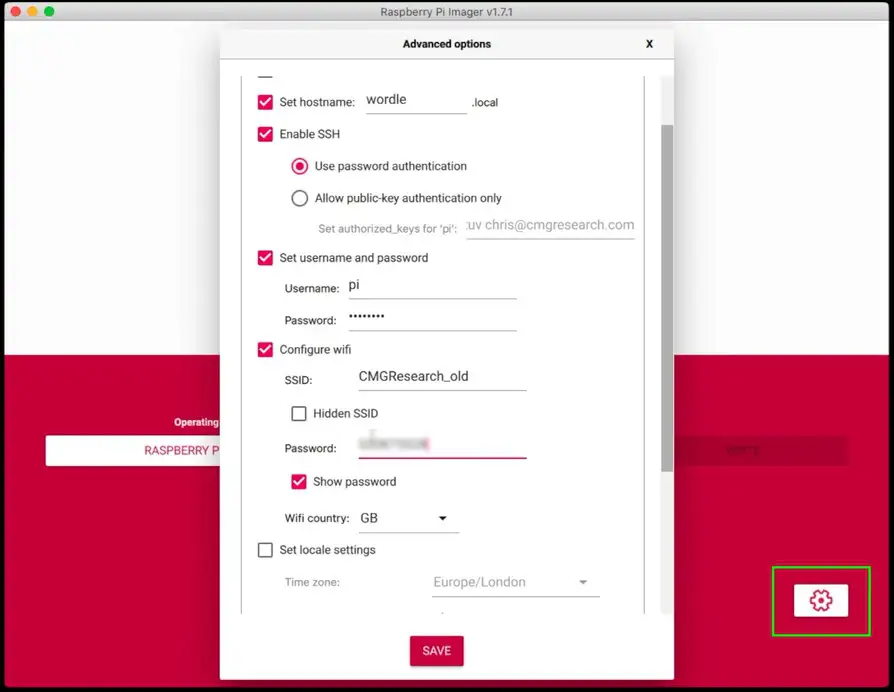
First off we’ll do a headless setup of our Pi - this is now trivially easy with the Pi imager app as we can now access the advanced options using this cogwheel icon.
This lets set up the hostname, turn on SSH, set the username and password and add the WiFi credentials.
When we boot the Pi from the SD Card everything will be set up nicely for us.
Now for the magic part, we just open VSCode on our computer and install the “Remote Development” extension pack.
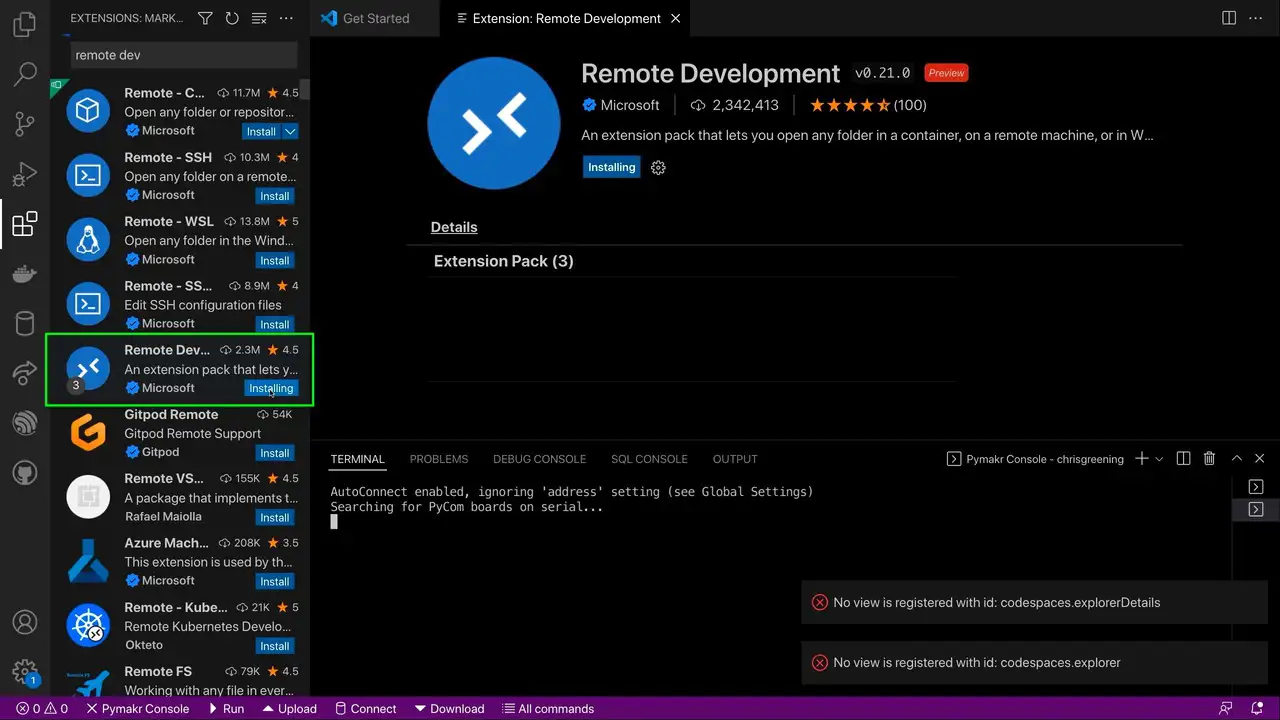
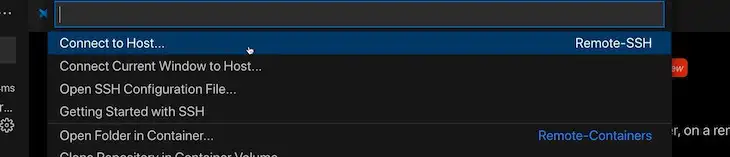
With this installed we now get this extra button in the bottom left of the window.

If we click on this button we get an option to connect to a host.
We just enter the same thing that we would use to connect via SSH - in my case the user is pi and I set up the machine to be on wordle so I just enter pi@wordle and then we enter the password.
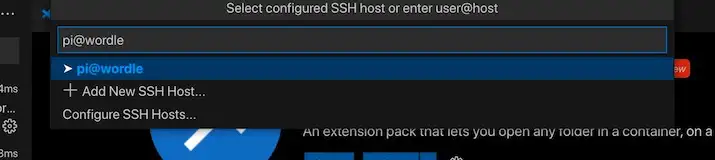
VSCode will install the VSCode server on the Pi and we’re good to go.
I’m going to use my wordle solving robot code as a demonstration project, so I’ll need to clone it from GitHub.
We can use the clone from git option in VSCode to do this for us and then we just open up the folder that has been cloned.

I’ve got an additional extension that I want to install into my remote environment - this is a python project, so I want to install the python extension.
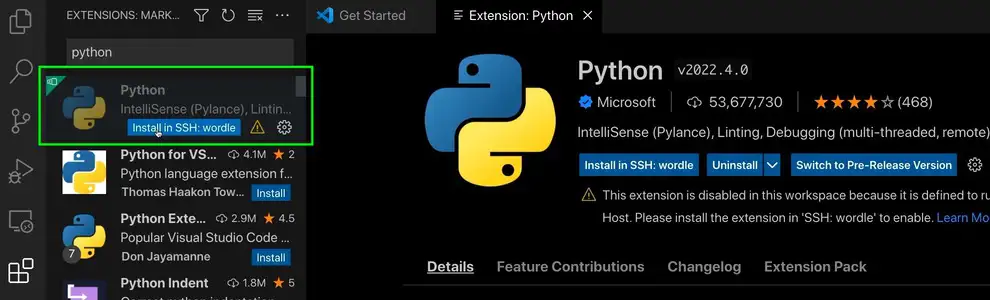
This will also install the extensions for running Jupyter Notebooks.
We’re now ready to finish setting up our project on the Pi.
I’ll open up a new terminal in VSCode - this automatically opens up a terminal on our Pi in the correct folder.
I can then just follow the instructions in my README.md file to get everything installed.
There are some native dependencies that I’ll need to install, so we’ll kick that off first.
sudo apt-get update
sudo apt-get install python3-picamera libjpeg-dev zlib1g-dev libfreetype6-dev liblcms2-dev libopenjp2-7 libtiff5 libatlas-base-dev -y
With that done we can install our python dependencies.
The first thing I’ll do is create a virtual environment - this keeps our python dependencies nice and local to our project.
VSCode should automatically detect that we have a virtual environment and will switch to using it for Python.
We then activate this environment in the terminal and install all our Python dependencies.
source venv/bin/activate
pip install -r requirements.txt
pip install -r requirements_pi.txt
This takes a while as we want Jupyter Notebooks, OpenCV and support for PiCamera.
We’re now ready to run our code - we can just click on the ipynb files and they’ll open up in VSCodes Jupyter Notebook viewer.
We can access the Pi’s camera directly and read images straight from it as all our code is running on the Pi.

We can step through each of our notebook cells. And, we can even debug the code and see what’s going on.
This is a really nice way of developing code on the Pi - we’ve got access to all the Pi’s hardware so we know immediately if our code will work or not.
There are as always some limitations, there’s no support for armv6 so you can’t use this on Pi Zero. But other than that it works really well.
You can watch a video of all this in action here:
And if you like the wordle solving robot - you can see it in action here:
Related Posts
Raspberry pi Infrared Receiver - In this fun tech adventure, I successfully managed to sync my infrared receiver to my Raspberry Pi. This involved correctly wiring up my IR sensor, installing and setting up LIRC, and creating a new lirc config file. I explained each step in detail and shared my major milestones, which included seeing a list of pulses when the remote was pointed at the receiver. Now my Raspberry Pi is fully controlled by my remote.
Raspberry Pi BTLE Device - Just wrapped up the first iOSCon hackathon and had a blast tinkering with my Raspberry Pi, turning it into a full-fledged Bluetooth device in sync with an iPhone app. Used node for setting up and Bleno for creating Bluetooth low energy peripherals. Penned down each step for you to replicate, right from writing strings on my LCD to reading temperatures and getting notified of IR remote button clicks. Ran it on an app store or GitHub test application. Also, explored the Core Bluetooth framework for iOS app creation, for reading and writing data to the Raspberry Pi. Let's keep creating magic with technology!
Connecting up the MCP23S17 and HD44780U based LCD - Ever wondered how to hook up an LCD display with your Raspberry Pi without using up all your GPIO pins? With the right tools, such as the MCP23S17 and wiringPi, you can effortlessly keep your I2C, UART, and SPI functionalities free for other worthwhile endeavors. This blog post truly proves that the GPIO is quite flexible with the I2C or SPI pins and setting up the MCP23S17 is as simple as connecting the pins. And with support for 5v LCD modules, I can assure you that this setup is definitely lit!
Raspberry Pi iBeacon - In today's blog post, I successfully turned my Raspberry Pi into an iBeacon using a Bluetooth dongle and following an Adafruit tutorial. I had to go under the hood a bit to make sure my dongle was recognized, but after adding some udev rules, it was good to go. Then, with a string of terminal commands, I was able to set it up as an iBeacon broadcasting a specific UUID. Testing it out with a basic iOS app, I was able to detect the signal strength from the beacon! While it wasn't the flashiest project, it was definitely satisfying to see it work.
Connecting PSQL and Rails Console to Elastic Beanstalk - In this post, we explore a solution to the challenge of running the Rails console against a PostgreSQL database housed in a private subnet for security reasons. While it's a good security practice, it can limit access for bootstrapping users or debugging issues. By tunnelling through a Bastion server, we can establish a connection to the database as if it was running locally. We walk through code examples of SSH tunneling, database connection, and how to run Rails console. A key point is to ensure the Bastion server is shut down after use.
Related Videos
Revolutionize Your Raspberry Pi Development with VSCode Remote! - Learn how to develop code on Raspberry Pi using VSCode without needing VNC or a desktop environment by setting up a remote development environment. Develop your projects more conveniently and efficiently with this powerful tool!
Raspberry Pi Hidden Settings - Setup Hostname, SSH and WiFi from the Pi Imager Application. - Uncover a hidden screen in the Raspberry Pi Imager Application to easily set up SSH, WiFi, and hostnames for your device without creating additional files. Just press Ctrl+Shift+X!
Getting started with Raspberry Pi Pico - MicroPython - Learn how to get started with Raspberry Pi Pico by soldering headers, writing codes, and building a classic blinking LED project in this tutorial.
Live GPIO Viewer - In my latest discovery, I found an incredibly efficient visualization tool from the last outpost workshop that upgrades how I check the status of the GPIO pins on my ESP32. It's super simple to use and allows me to monitor pin activities directly. I set up a couple of LEDs and a button on various GPIO pins to demonstrate its effectiveness and the results were fantastic. Although it currently supports only digital input and output and PWM, I'm optimistic it will expand with time. Thanks to the open-source community, you can find the setup instructions in a GitHub repo. This tool is a revelation and I highly recommend it.
Reviving a Broken iPad: Transforming it into a Magic Mirror with Raspberry Pi Zero - Learn how to transform an old iPad 1 screen and a Raspberry Pi Zero into a Magic Mirror with this step-by-step guide! Enhance your home with this unique, DIY upgrade.
HELP SUPPORT MY WORK: If you're feeling flush then please stop by Patreon Or you can make a one off donation via ko-fi