View All Posts
read
Want to keep up to date with the latest posts and videos? Subscribe to the newsletter
HELP SUPPORT MY WORK: If you're feeling flush then please stop by Patreon Or you can make a one off donation via ko-fi
#AMAZON AWS #APP DEPLOYMENT #ELASTIC BEANSTALK #INSTANCES #LOAD BALANCER #PRIVATE SUBNETS #PUBLIC SUBNETS #RUBY ON RAILS #SECURITY GROUPS #VPC

This is the second post in a series of blog posts that describe how to deploy a Rails application to Elastic Beanstalk in a Virtual Private Cloud (VPC) on Amazon AWS.

In the previous post we configured a new VPC with public and private subnets along with security groups for our servers.

In this post we’ll setup a new Elastic Beanstalk application and deploy it in our VPC.

We’ll be setting up a Rails application for this example and initially we’ll just deploy the sample application.

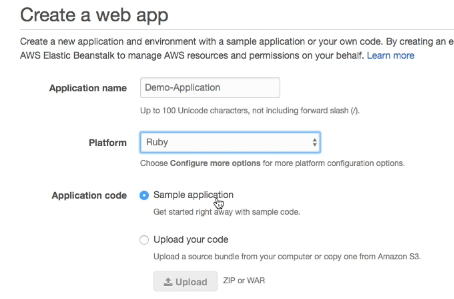
The first thing we’ll do is create the Elastic Beanstalk application and pick Ruby as our platform:

Create a Ruby Application and Deploy Sample Application

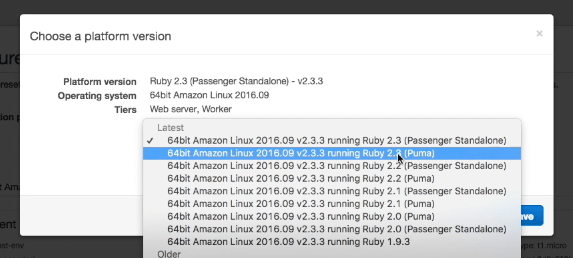
We then click the “Configure More Options” button so we can control the setup in more detail. The first thing that we want to configure is platform configuration:

Change Platform Configuration

I going to be deploying a Rails 5 application that uses Puma - so I want to make sure Elastic Beanstalk matches my local configuration:

Select Puma and Ruby 2.3.3

We want to use an Elastic Load Balancer to expose our Application to the internet - a quick way to get the basics for this configured is to select the “High Availability” radio box and then customise the defaults that gives you.

The main settings we will need to change are on the “Network” card. On this card we pick the VPC that we want to deploy our application to and set our Load Balancer to publicly visible:

Deploy to our new VPC

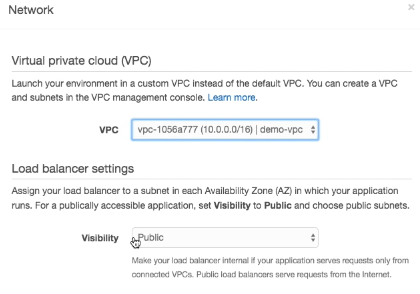
We can then select the subnets that we want our Load Balancer to run in. For our deployment this should be the public subnets we created in step 1.

Select Public Subnets for Load Balancer

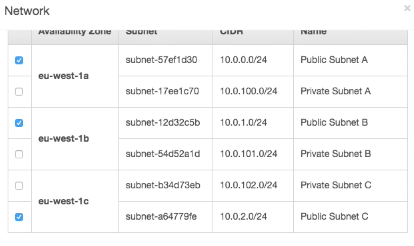
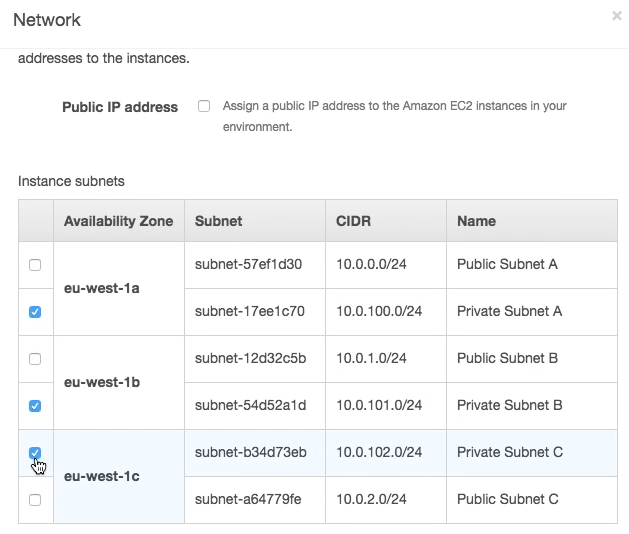
For our instances, we want these placed in our private subnets and we don’t want to assign a public IP address to them. All access to our instances will be via the Load Balancer so these machines definitely don’t need to be publicly accessible.

Select Private Subnets for Instances

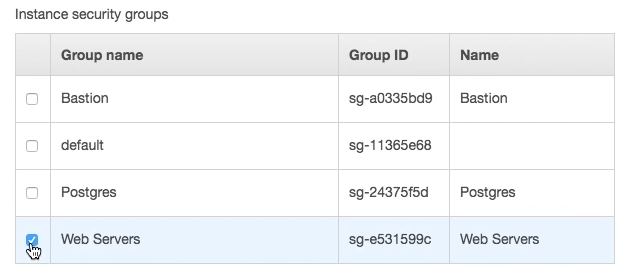
Finally we want to set the security group for our instances. In our case this will be the “Web Server” security group. This security group does not actually open any ports on our instances. What it does provide is access to our database security group. Under the hood, when instances are added to our load balancer an additional security group is added automatically that allows access to ports 80/443 from the load balancer.

Choose instance security group

For the database card - we leave this blank so that we can create a database instance independently from our elastic beanstalk environment. This gives us a bit more flexibility on the lifetimes of our Elastic Beanstalk and our RDS instances (you may want to terminate an Elastic Beanstalk application but re-use your RDS instance).

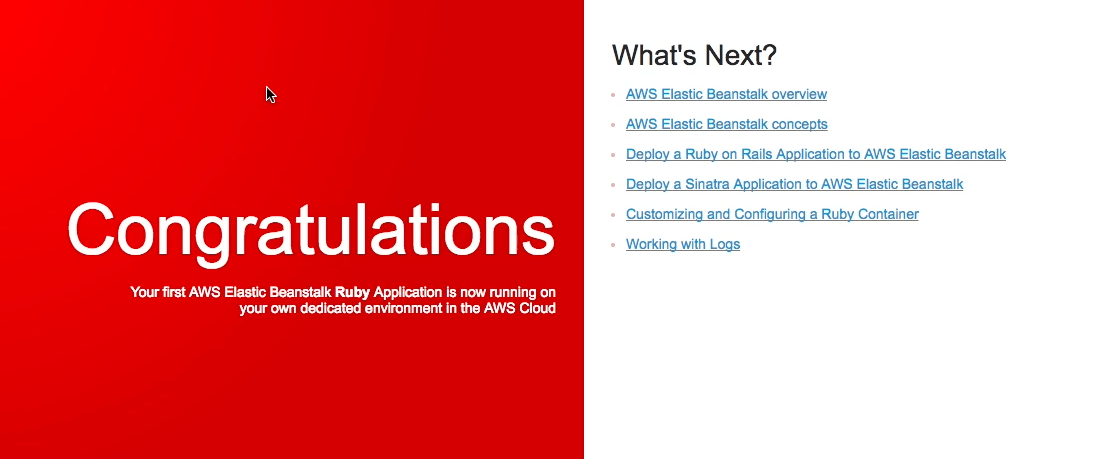
Assuming all goes well, once the environment has launched you should see the sample application up and running on Elastic Beanstalk.

Sample Application up and Running

#AMAZON AWS #APP DEPLOYMENT #ELASTIC BEANSTALK #INSTANCES #LOAD BALANCER #PRIVATE SUBNETS #PUBLIC SUBNETS #RUBY ON RAILS #SECURITY GROUPS #VPC

Related Posts

Step 1 - Setup VPC: Deploying a Rails Application to Elastic Beanstalk - In this blog post, I am guiding you through the process of deploying a Rails application to Elastic Beanstalk in a Virtual Private Cloud (VPC) on Amazon AWS. I detail the setup of a VPC, subnets, and internet gateways, as well as the configuration of NAT gateways and security groups. Ultimately, this will allow for a safe, internet-accessible environment for your application and its accompanying databases.
Step 4: Deploy Rails App To Elastic Beanstalk from Command Line - This post guides you through the essential steps of creating and deploying a Rails application into Elastic Beanstalk environment. Topics include creating an AWS user, configuring AWS CLI for deployment, and setting up the environment variables for your app. Also, it provides you the valuable knowledge of connecting your Rails app to RDS instance and ensuring it successfully connects with the dev database.
Step 5: Use CircleCI to Deploy To Elastic Beanstalk - In this blog post, we're going to set up an automated deployment pipeline using CircleCI, GitHub, and AWS Elastic Beanstalk. We'll begin by creating a GitHub repository for our Rails application. Next, we're going to help CircleCI understand our build environment by creating a `circle.yml` file to install the AWS EB CLI tools and to define commands for deploying our application. Lastly, we'll set up the required AWS credentials in CircleCI. Once completed, any changes pushed to the develop or master branch in GitHub will trigger a deployment to the respective environment in Elastic Beanstalk.
Step 8: Set up Active Job on Elastic Beanstalk - This blog post walks through setting up a worker environment on Elastic Beanstalk and using SQS as our Active Job queue, using the active-elastic-job Gem. We start by creating a new queue in our AWS account via Simple Queue Service. Then, we provide our Elastic Beanstalk environments access to the queue and add an AWS_REGION environment variable. We proceed to creating and configuring our worker environment. In our Rails app, we instruct Active Job to use our active-elastic-job queue adapter and create an Active Job. Finally, we deploy our changes to both the web and worker environments, ensuring our ActiveJobs run successfully.
Step 3 - Configure RDS: Deploying a Rails Application to Elastic Beanstalk - We're moving on and tightening our database security in step 3. We're running our database in private subnets within a created RDS instance on our VPC, making sure our data isn't accidentally left in the open. After setting up our network and security settings, we'll dive into creating our databases manually via our secure Bastion server. With a few commands, we set up our dev and prod databases, don them with strong passwords and grant them access to our master username. Voila, our RDS instance is ready to go! Stay tuned for step 4, where we unveil the real deal, deploying a Rails app.

Related Videos

Revolutionize Your Raspberry Pi Development with VSCode Remote! - Learn how to develop code on Raspberry Pi using VSCode without needing VNC or a desktop environment by setting up a remote development environment. Develop your projects more conveniently and efficiently with this powerful tool!
AR Sudoku Solver in Your Browser: TensorFlow & Image Processing Magic - Discover how to recreate a Sudoku app using browser APIs and ecosystem advancements, and explore the image processing pipeline technique for extracting Sudoku puzzles and solving them.
The Hacker News Effect - The Website Didn't Catch Fire - Let's look at the traffic - Witness the Hacker News effect in action as the author's blog skyrocketed to popularity, easily handling massive traffic thanks to efficient hosting and Cloudfront!
WiFi or BlueTooth - What's the best way to communicate with our things? - Discover the world of smart devices and the wireless connection options available for app developers, such as Bluetooth Low Energy and Wi-Fi. Learn about the history, performance, and challenges of these technologies and how to use them to build successful apps that communicate with hardware.
M5Stack Core 2 - Audio Input - Explore the audio capabilities of the M5Stack Core 2, and learn about the potential impact of the plastic case and differences between the PDM and PCM microphones. Discover how to set up the I2S config, manage audio processing, and create a stunning audio visualizer.
HELP SUPPORT MY WORK: If you're feeling flush then please stop by Patreon Or you can make a one off donation via ko-fi
Want to keep up to date with the latest posts and videos? Subscribe to the newsletter
Blog Logo

Chris Greening


Published

> Image

atomic14

A collection of slightly mad projects, instructive/educational videos, and generally interesting stuff. Building projects around the Arduino and ESP32 platforms - we'll be exploring AI, Computer Vision, Audio, 3D Printing - it may get a bit eclectic...

View All Posts