View All Posts
read
Want to keep up to date with the latest posts and videos? Subscribe to the newsletter
HELP SUPPORT MY WORK: If you're feeling flush then please stop by Patreon Or you can make a one off donation via ko-fi
#HARDWARE #IRONOS #OPEN SOURCE FIRMWARE #RASPBERRY PICO W #SOLDERING #TECH #TS80P SOLDERING IRON

I decided to get one of the TS80P soldering irons that everyones seems to have been raving about for the past year or so.

The main reason I wanted to get this is bacause you can easily flash it with an open source firmware called IronOS which I think is a pretty cool thing to do.


You can pick up a TS80P from Amazon or AliExpress. The USB power monitor I’m using is this one.

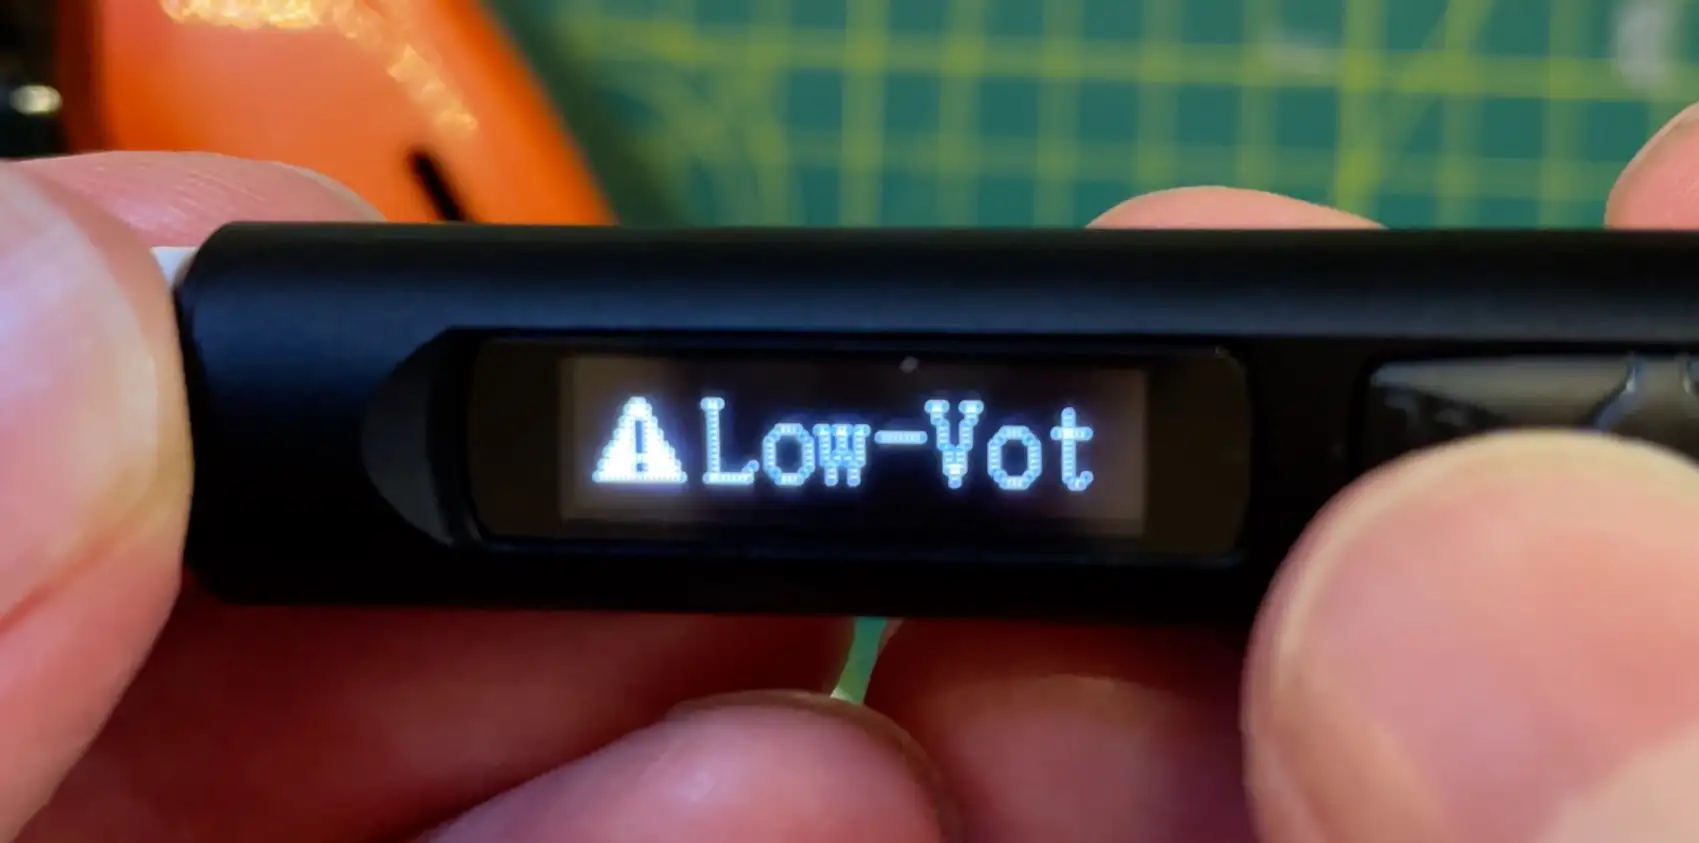
One of the things to be aware of is that you are going to need a power supply that supports Quick Charge or Power Delivery.

If you try and use the iron with a normal USB supply then it won’t work and will display this nice little error message.

Low Voltage

I’ve got a couple of USB power supplies that support Power Delivery - the Apple charger for my laptop and I’ve got this nice compact 65W GaN fast charger. It looks like Gallium nitride is going to become the standard for swiching power supplies. It should be a lot more efficient.

Unfortunately I don’t actually have any Quick Charge compatible chargers to test.

The GaN charger I’m using is available here.

Let’s try out the apple one first. I’ve got it connected up through my USB power monitor as soon as I click the heating button we start using almost 9 volts and almost 2amps. Interestingly the power reported from my USB power monitor is slightly more than what is reported by the soldering iron.

Apple Power Supply

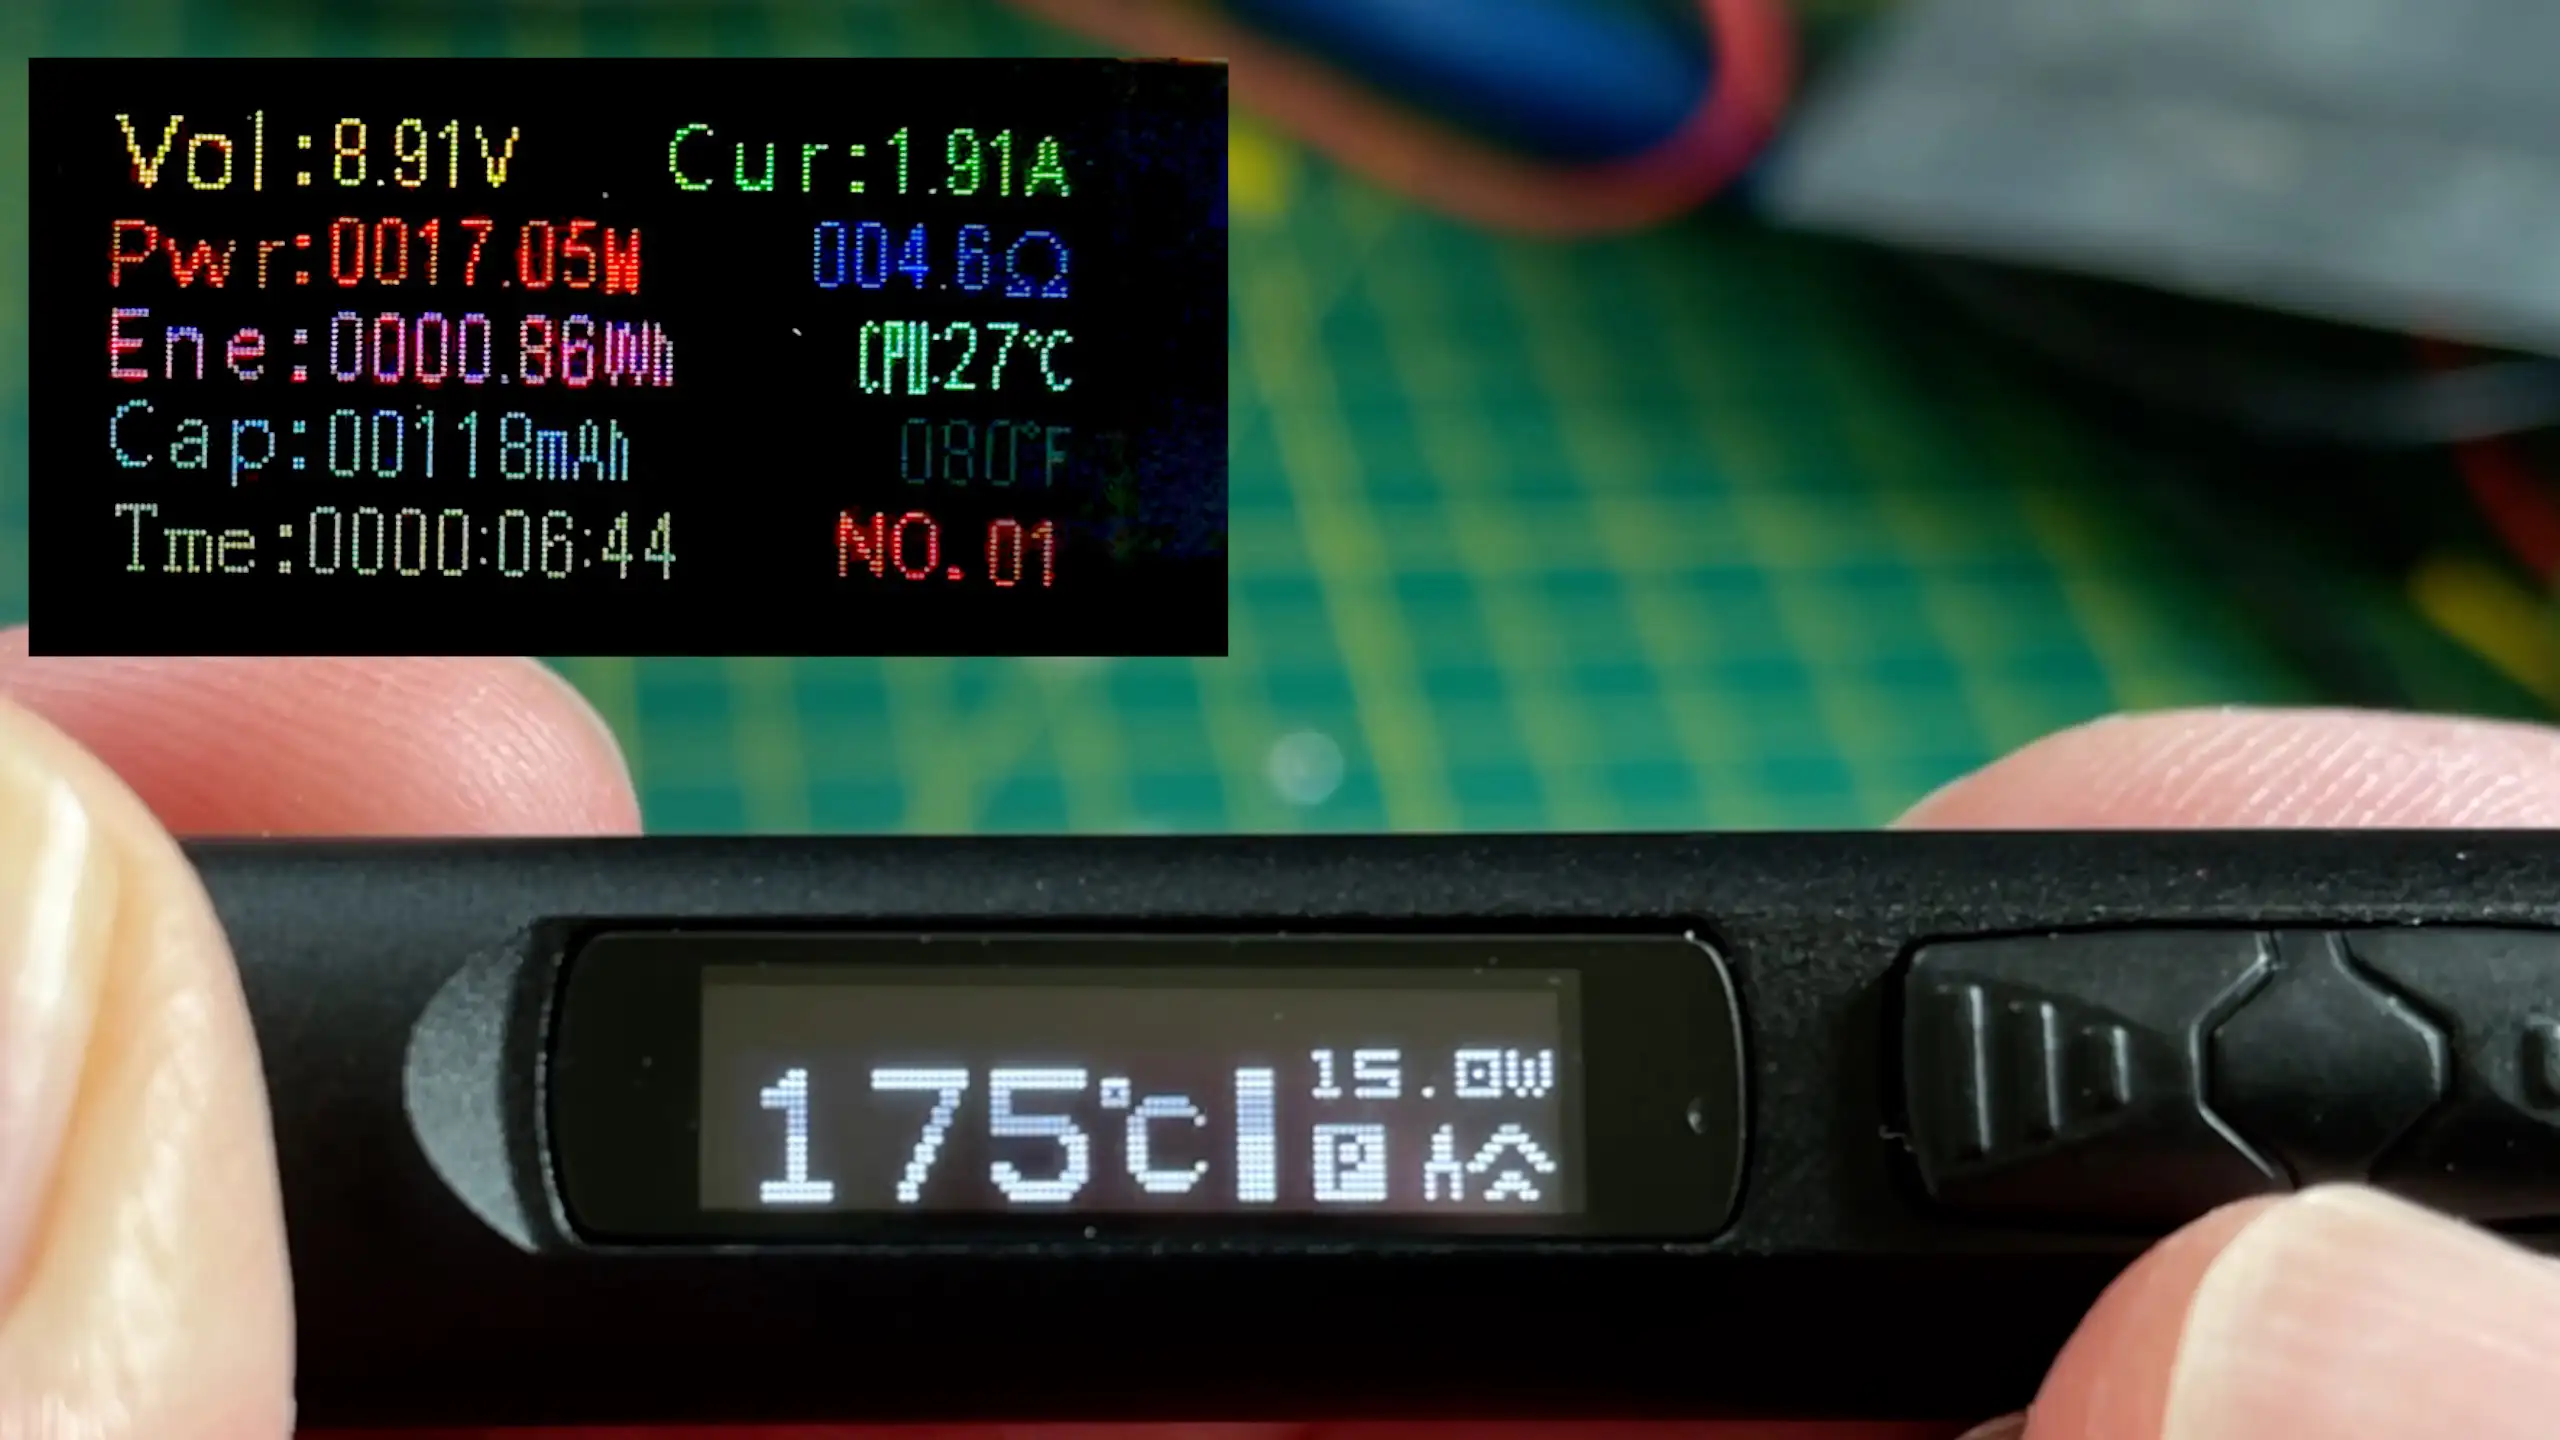
We get up to temperature in just under 20 seconds.

With the fast charger we get much better results. Interestingly when we click the button it takes a couple of seconds for it to start using the full 12 volts, but once it gets going the temperature shoots up. We’re up temperature in 10 seconds.

GaN Power Supply

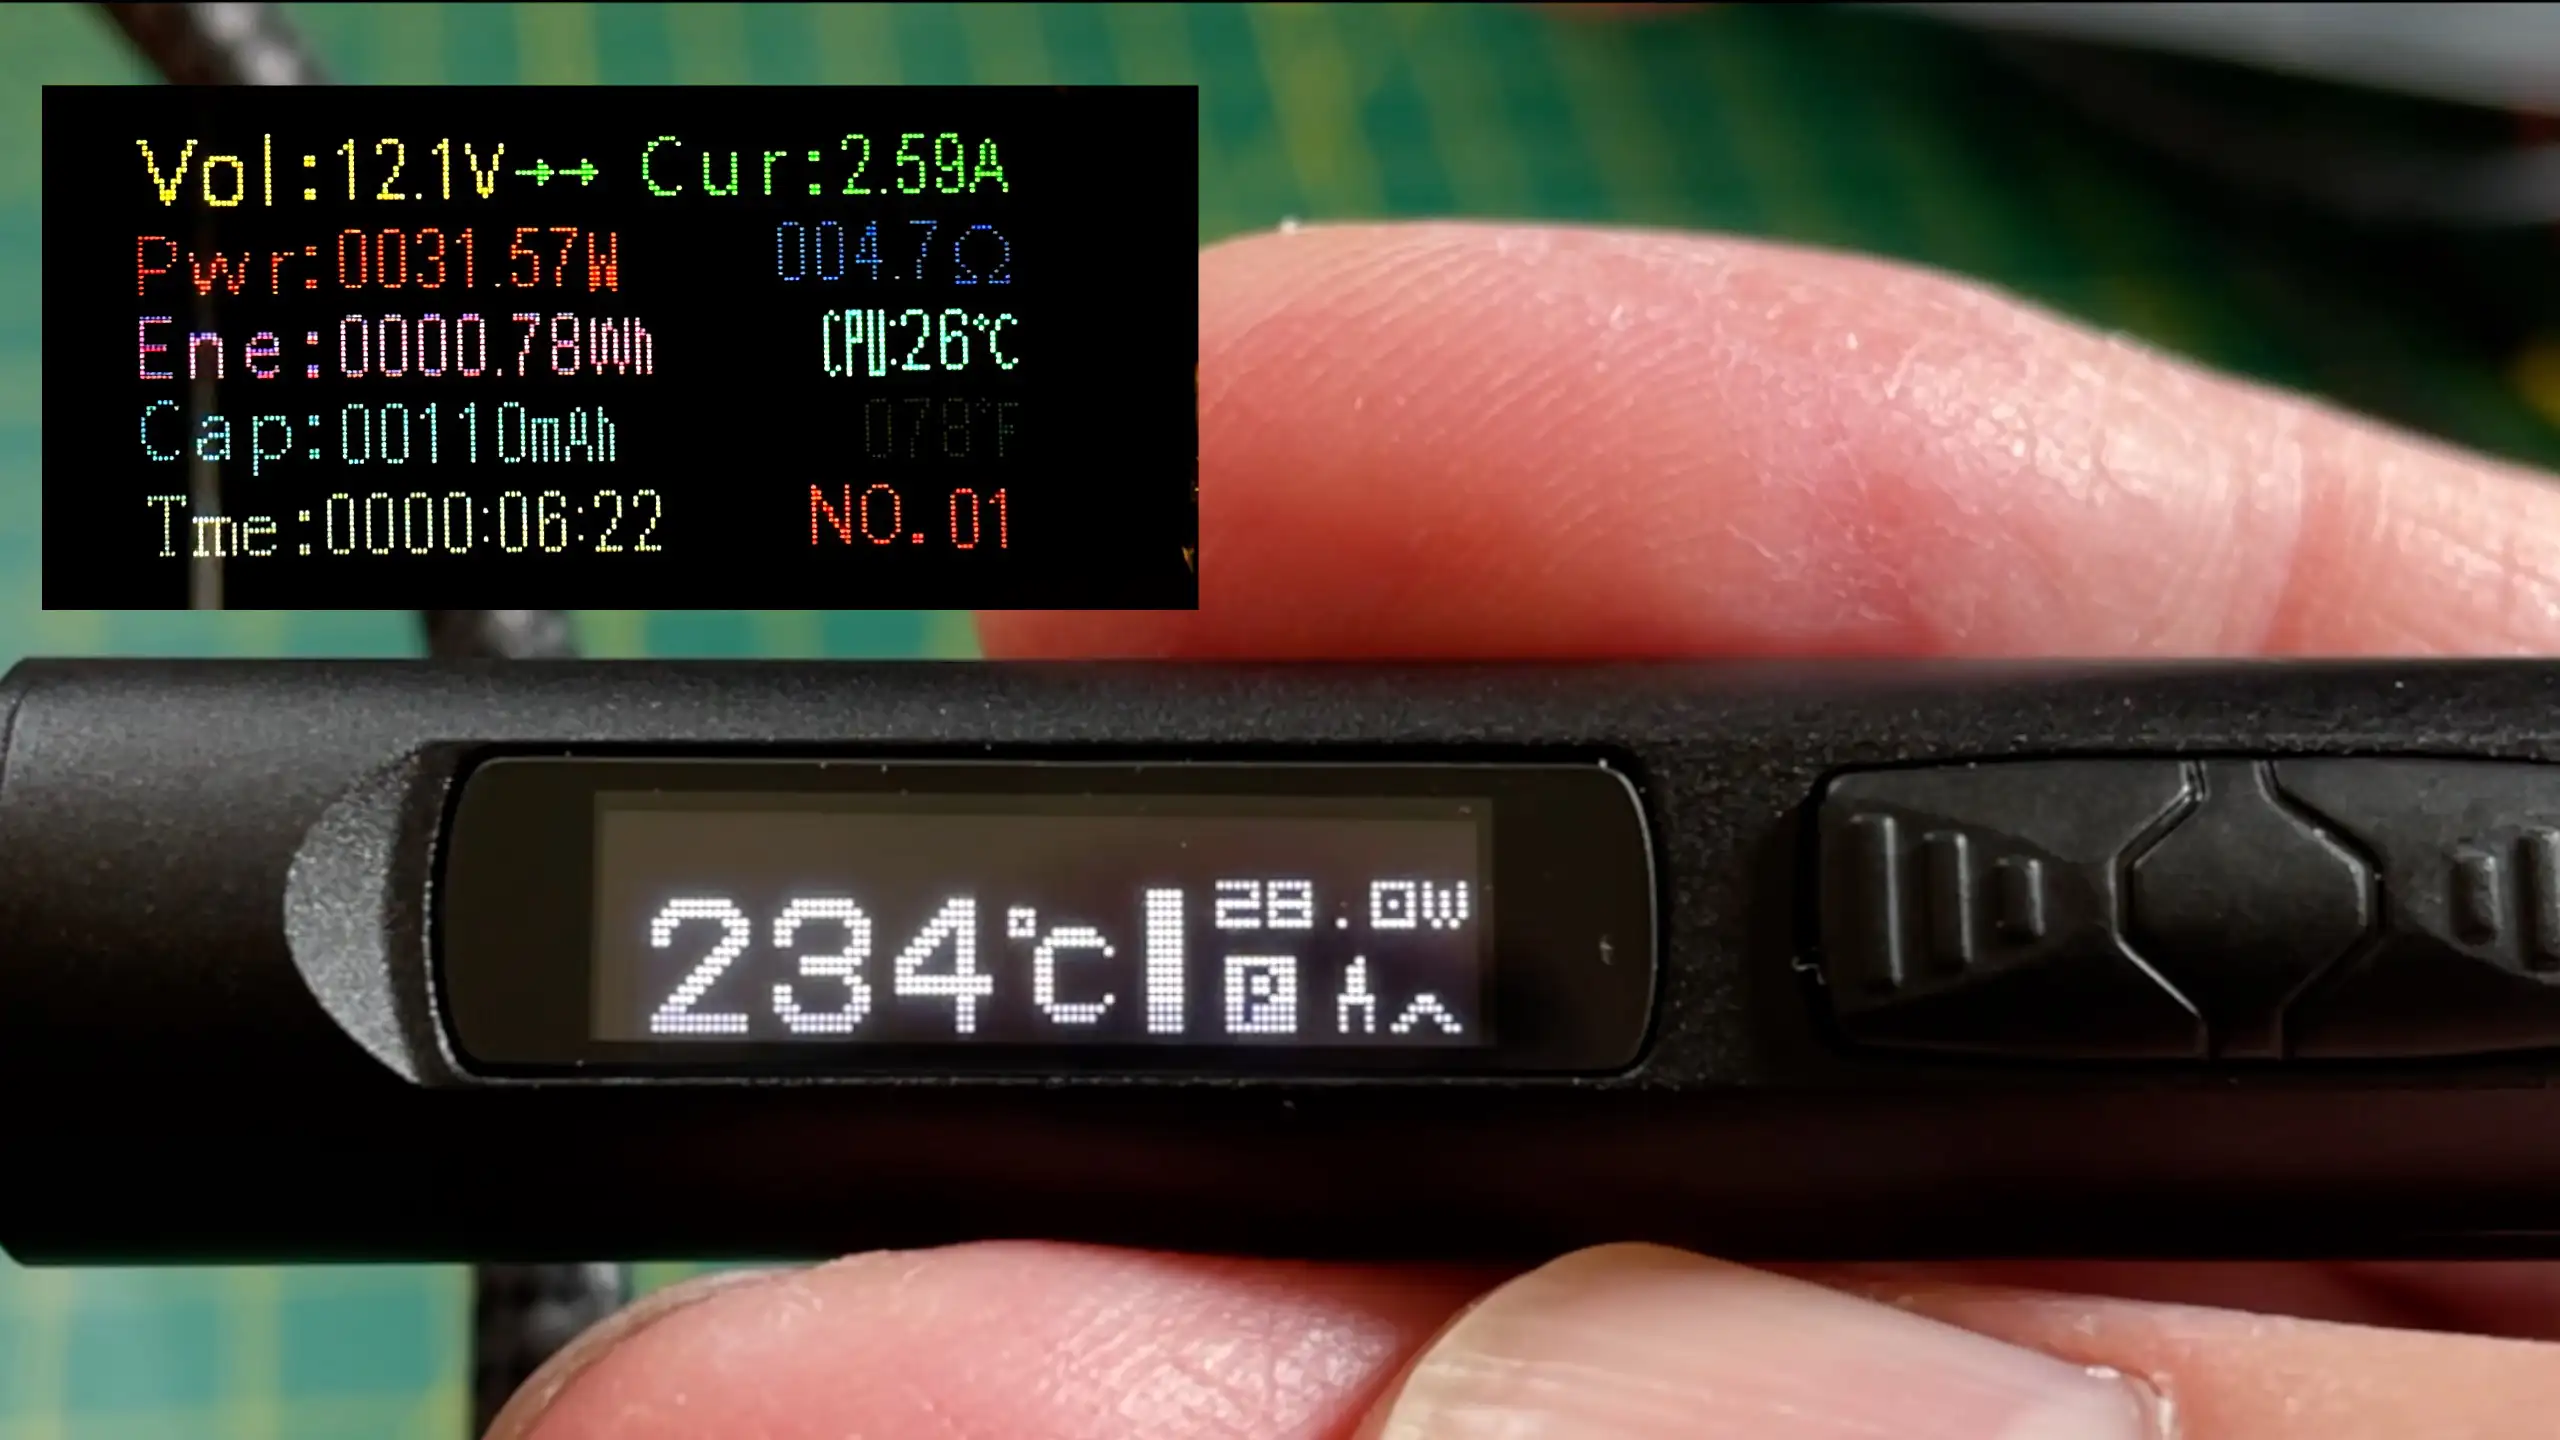
Twice as fast - which is not that surprising as we were getting twice as much power almost 30 watts vs 15 watts.

I believe with the Apple charger the next voltage it supports after 9v is 15v. The maximum voltage the soldering iron can take is 12v so we’re limited to 9v if we use the Apple charger.

Flashing with the open source IronOS firmware is really easy. To get the iron into DFU mode you just hold down the button when you connect it to a USB port on your computer. The device is mounted as a flash drive and we simply drop the new firmware version into it.

If it’s successful then we’ll see the file renamed to the new extension “RDY”. If it fails then we’ll see the extension changed to “ERR”. If that happens then just give it another go.

What’s interesting is that with the new firmware we can now power the iron off our USB supply - it does draw around 1 amp though, so you will need a supply that is capable of that. And you’ll also need quite a lot of patience as it is slow.

Working off 5V

But, in an emergency situation where it’s all you have it will probably be ok - let’s stop this now as it’s going to take a while…

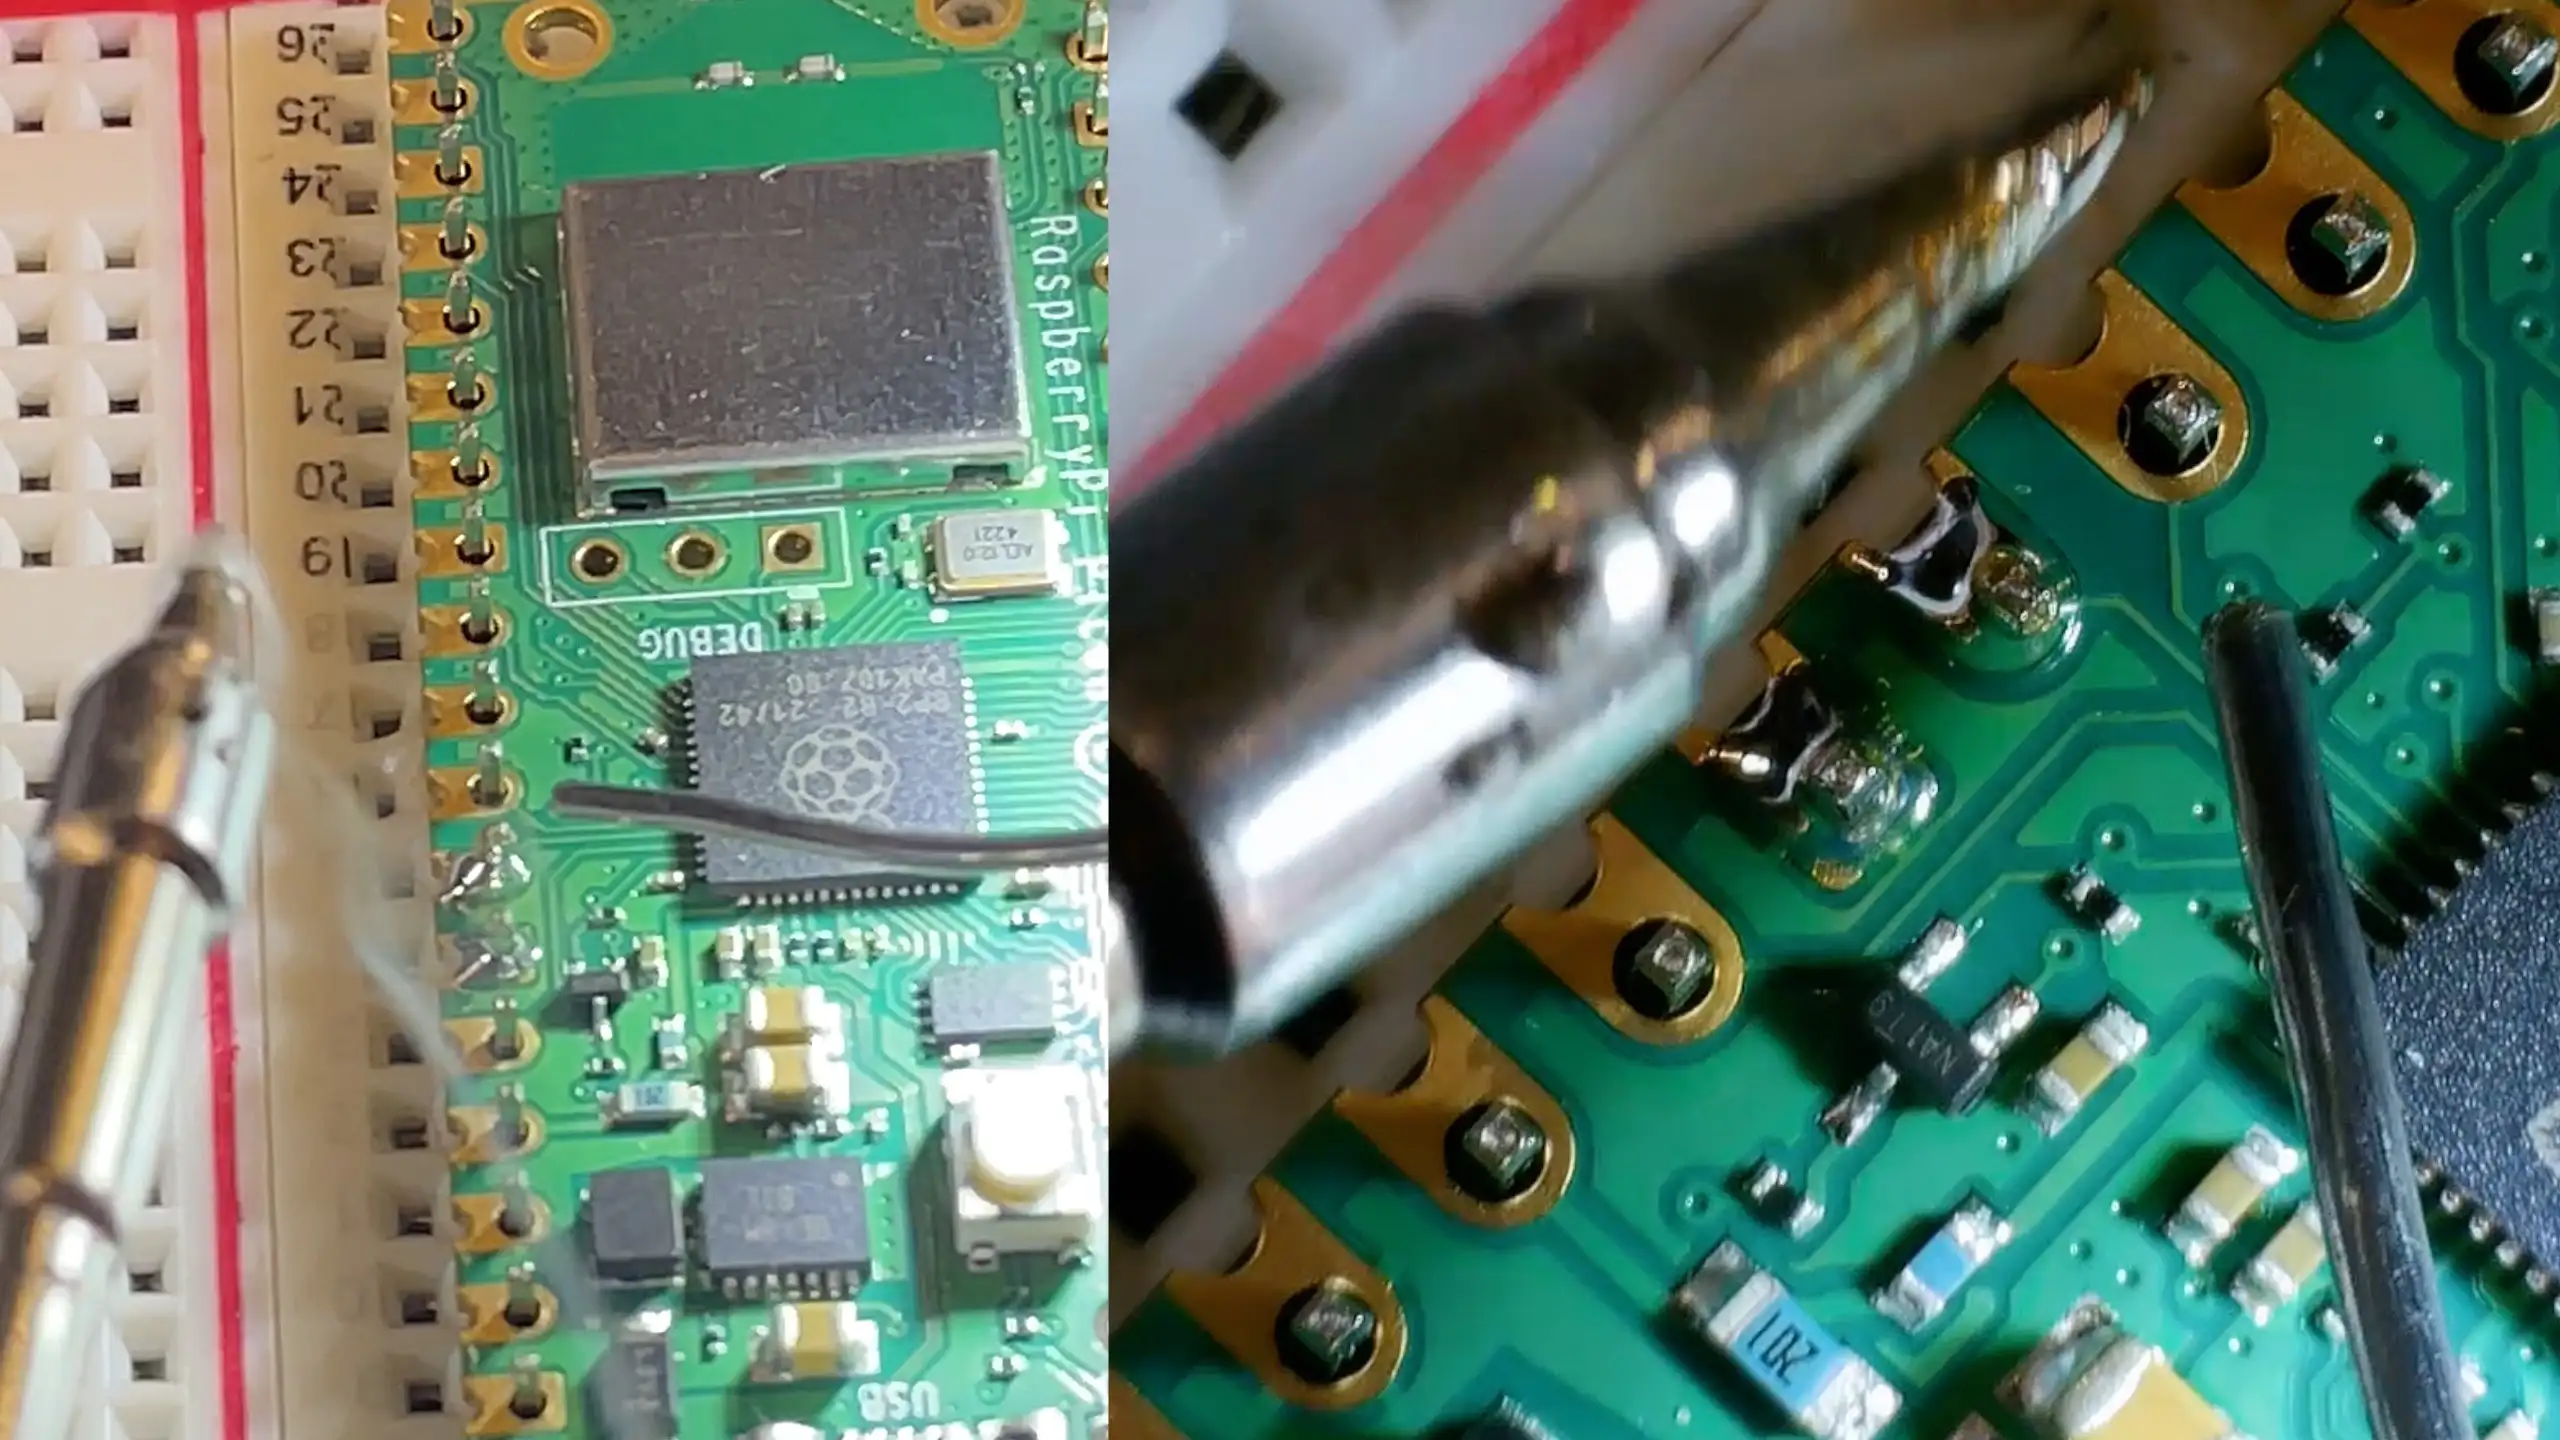
I managed to get my hands on Raspberry Pico W and need to solder on some headers.

The results are pretty good - I’ve never been especially good at soldering, which I why I tend to do surface mount nowadays, I’ve got some new boards to solder up from PCB way for some future projects and there are always some through hole components and headers needed.

Soldering

One thing that caught me out with the pico W is that the standard LED blink sketch didn’t work - you have to use the string ‘LED’ instead of the number 25.

import machine
import time

import machine
led = machine.Pin("LED", machine.Pin.OUT)

while (True):
    led.on()
    time.sleep(0.5)
    led.off()
    time.sleep(0.5)

And you need to flash with a nightly build of micropython - if you don’t then the sample code doesn’t work.

This is pretty painless, we just hold down the bootsel button and then drop the new firmware into the USB drive.

And we’ve got a flashing LED - pretty cool. I’ll be exploring the pi pico W in future projects.

Flashing

#HARDWARE #IRONOS #OPEN SOURCE FIRMWARE #RASPBERRY PICO W #SOLDERING #TECH #TS80P SOLDERING IRON

Related Posts

I Need More USB Power! - I've been accumulating more and more USB powered devices for my workbench lately, and my single 65W USB-C supply just isn't cutting it anymore. So, I've decided to source a new solution. After some digging, I stumbled upon a remarkable board on AliExpress with four USB standard sockets and four USB-C ports, which support just about every protocol there is! Oh, it easily delivers a solid 65 Watts. With this, I am finally able to fully power my gear. From mini hotplates to soldering irons, my workbench is more juiced up than ever!
No Power? No Problem! A Wireless Pi Doom Machine - In my latest wireless charging experiments, I got my hands on a set of wireless charging PCBs and dove into testing different voltage inputs and their efficiency levels. It was interesting to realise that the 5V input managed to provide a decent efficiency of 73%, while 12V input struggled and heated the receiver board excessively. With the perks and limits of this setup explored, I took a whirl at creating a wireless Pi Doom machine. It worked like a charm! However, I quickly noticed the need to split charging and boost board into two different modules - a project to look forward to. Half the fun is getting there! Check out the video [here](https://youtu.be/glCIuOoFm7U) for more detail on the project.
Forget SSH and vim, Use VSCode to Remote Develop on the Raspberry Pi - In this blog post, I share how you can avoid hassles of SSH and use VSCode for remotely developing on the Raspberry Pi. I walk through how to initially configure the Pi in a headless setup using the Pi imager app. Then, we install the 'Remote Development' extension in VSCode. I illustrate how easy it is to connect to the Pi using our SSH credentials, clone a GitHub project, and install python extensions. Finally, I explore how to run the code and debug it. However, note that the method doesn't support armv6, so you can't use it on Pi Zero.

Related Videos

Upgrade Your Soldering Game: TS80P IronOS Flash & Raspberry Pi Pico W Soldering - Upgrade your soldering skills with the TS80P soldering iron, known for its compatibility with open-source firmware IronOS. Witness how it quickly heats up when paired with different USB power supplies, and its potential to replace traditional soldering stations.
Soldering up another ESP32-S3 board and a 3in1 Oscilloscope - So in this video, I had a fun time experimenting with the cool gadgets sent over to me by Fury. I unwrapped this awesome USB soldering iron that looks quite promising and useful. The tiny solder stand, a Galium nitri power supply and a collection of soldering iron bits that they sent over were quite appreciable. The video took a spin when I introduced the novel 3in1 oscilloscope. This tool bundles an oscilloscope, a transistor tester and a signal generator. Well, that's a triple threat! I went on to test the soldering iron and it showed some remarkable results. The video ended with me trying out the oscilloscope and I must say, this little toy packs a punch! All things considered, pretty pleased with my new tech. Can't wait to get down and dirty with all the nitty-gritties these gadgets offer!
DIY Power Bank: 20,000mAh? - Discover the efficiency of a DIY 20,000mAh USB-C power bank compared to commercial versions, as a control board and lithium batteries charge up an array of devices, including a soldering iron and mini-hotplate, while also considering the project's overall cost.
A Lot of Hot Air - Soldering ESP32-S3 Boards - In this video, I test out the new hot air rework station I just got to solder my Mini esp32 S3 boards. I dissect the hot air gun, encountering an Australian plug and a couple of interesting quirks inside the control PCB. I attempt to understand the circuit, welcome your thoughts on the build quality, and then solder on a new, hopefully safer, UK-compliant plug. Post-assembly, I apply way too much solder paste thanks to these tricky solder syringes, before setting the station to 300 degrees C for some hands-on rework. After some trials, I successfully fix some solder bridges with my soldering iron and behold, everything is connected and it works! It's just another blink sketch, but hey, it's confirmed – The new hot air station works!
Lovely High Res E-Paper Display - Just when we thought we'd done with our mailbag, some exciting new stuff tips up. This time, we've got a soldering kit, a fun-looking Dash, and extra bonus, an ink plate 10, which is a cool e-paper display from Soldered. We've unboxed it, pulling out a board with an esp32 module, an SD card, and a battery connector. One of the major selling points is its open-source nature, you can download all the schematics from GitHub, and for those inclined, learn about how to build pcbs. Also showcased a Simon Says game soldering kit, despite my modest soldering skills (we all need practice, eh?), it turned out to be good fun. Plus, we've got a Dev board fitted with an at Mega 328p and an ultra-bright ws2812 RGB LED. Let's see if I can turn this e-paper display into a weather display or maybe you have more exciting ideas, drop them down in the comments!
HELP SUPPORT MY WORK: If you're feeling flush then please stop by Patreon Or you can make a one off donation via ko-fi
Want to keep up to date with the latest posts and videos? Subscribe to the newsletter
Blog Logo

Chris Greening


Published

> Image

atomic14

A collection of slightly mad projects, instructive/educational videos, and generally interesting stuff. Building projects around the Arduino and ESP32 platforms - we'll be exploring AI, Computer Vision, Audio, 3D Printing - it may get a bit eclectic...

View All Posts