View All Posts
read
Want to keep up to date with the latest posts and videos? Subscribe to the newsletter
HELP SUPPORT MY WORK: If you're feeling flush then please stop by Patreon Or you can make a one off donation via ko-fi
#ALIEXPRESS #SOLDERING IRON #USB POWER #USB-C POWER #WORKBENCH GEAR

I seem to have been accumulating a whole bunch of USB powered devices. I’ve got the mini hotplate, a small power supply, and two USB soldering irons!

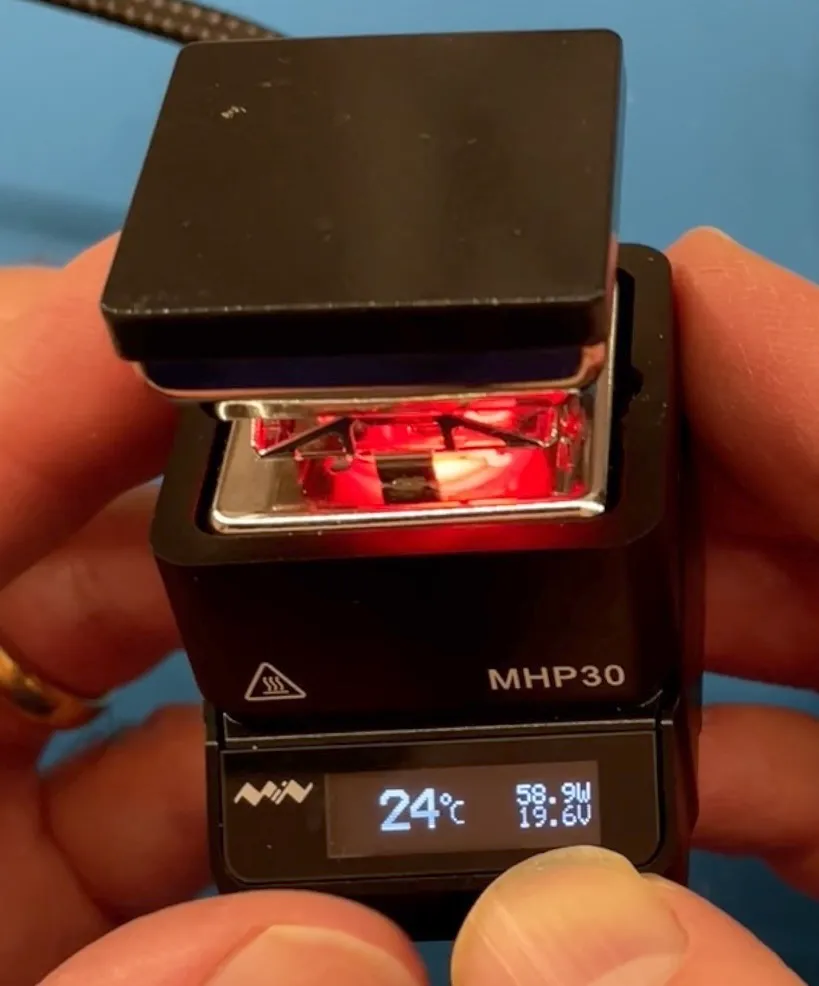
The mini hotplate takes 20 volts and uses around 60W when it’s heating up.

Mini Hotplate

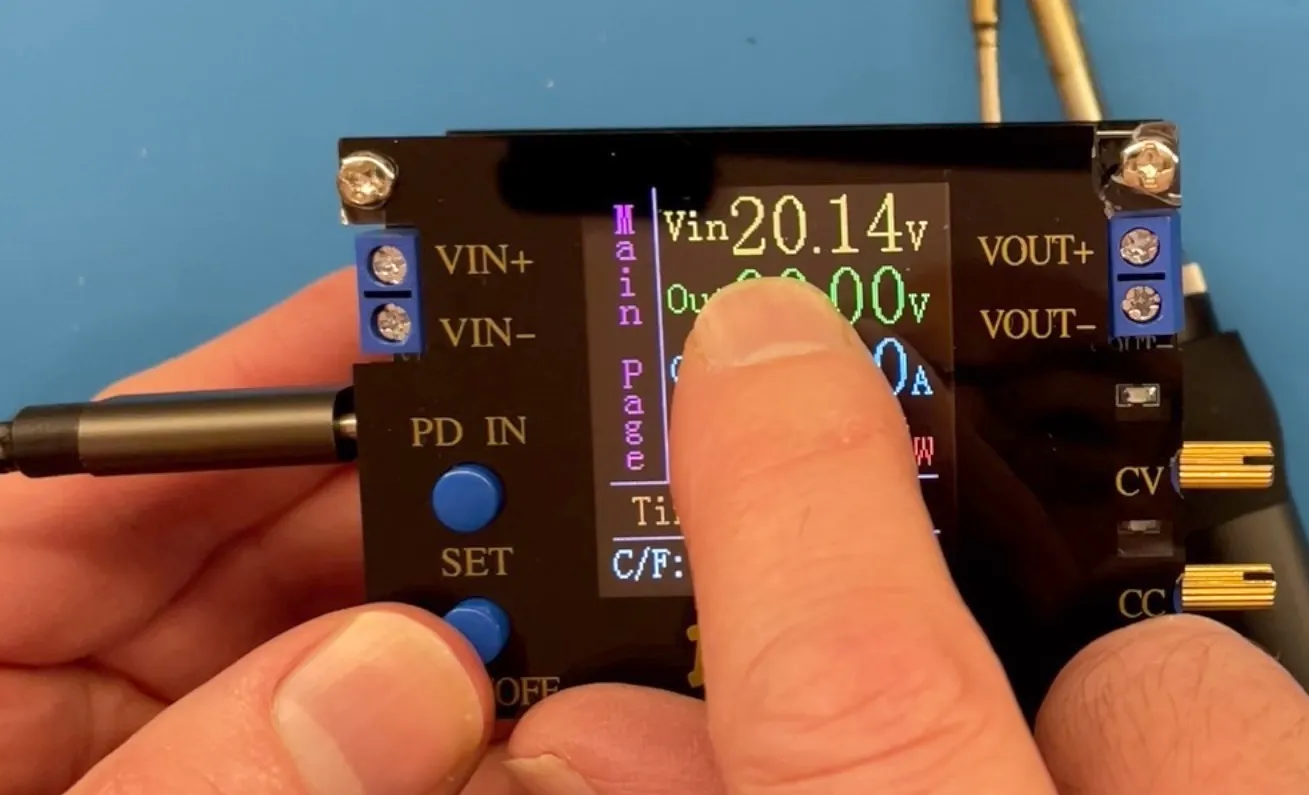
The power supply also wants 20 volts.

Power Supply

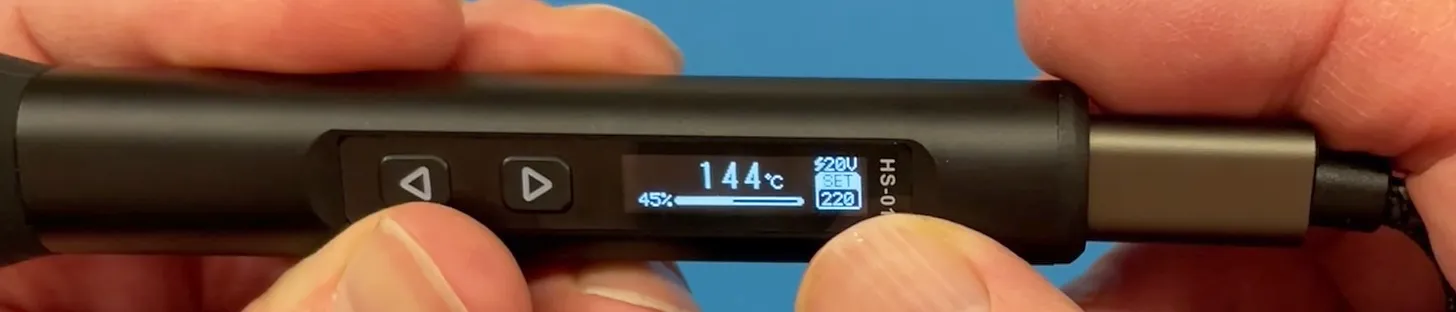
And one of the soldering irons is limited to 12 volts, and the other will use 20 volts.

Soldering Iron 20v

Soldering Iron 12v

It’s not a massive problem, but I do only have one 65W USB-C supply coming into workbench. I want more, I want much much more!

There don’t seem to be any powered USB-C hubs, so I went shopping on AliExpress and eventually came across this nice board:

USB-C Power Board

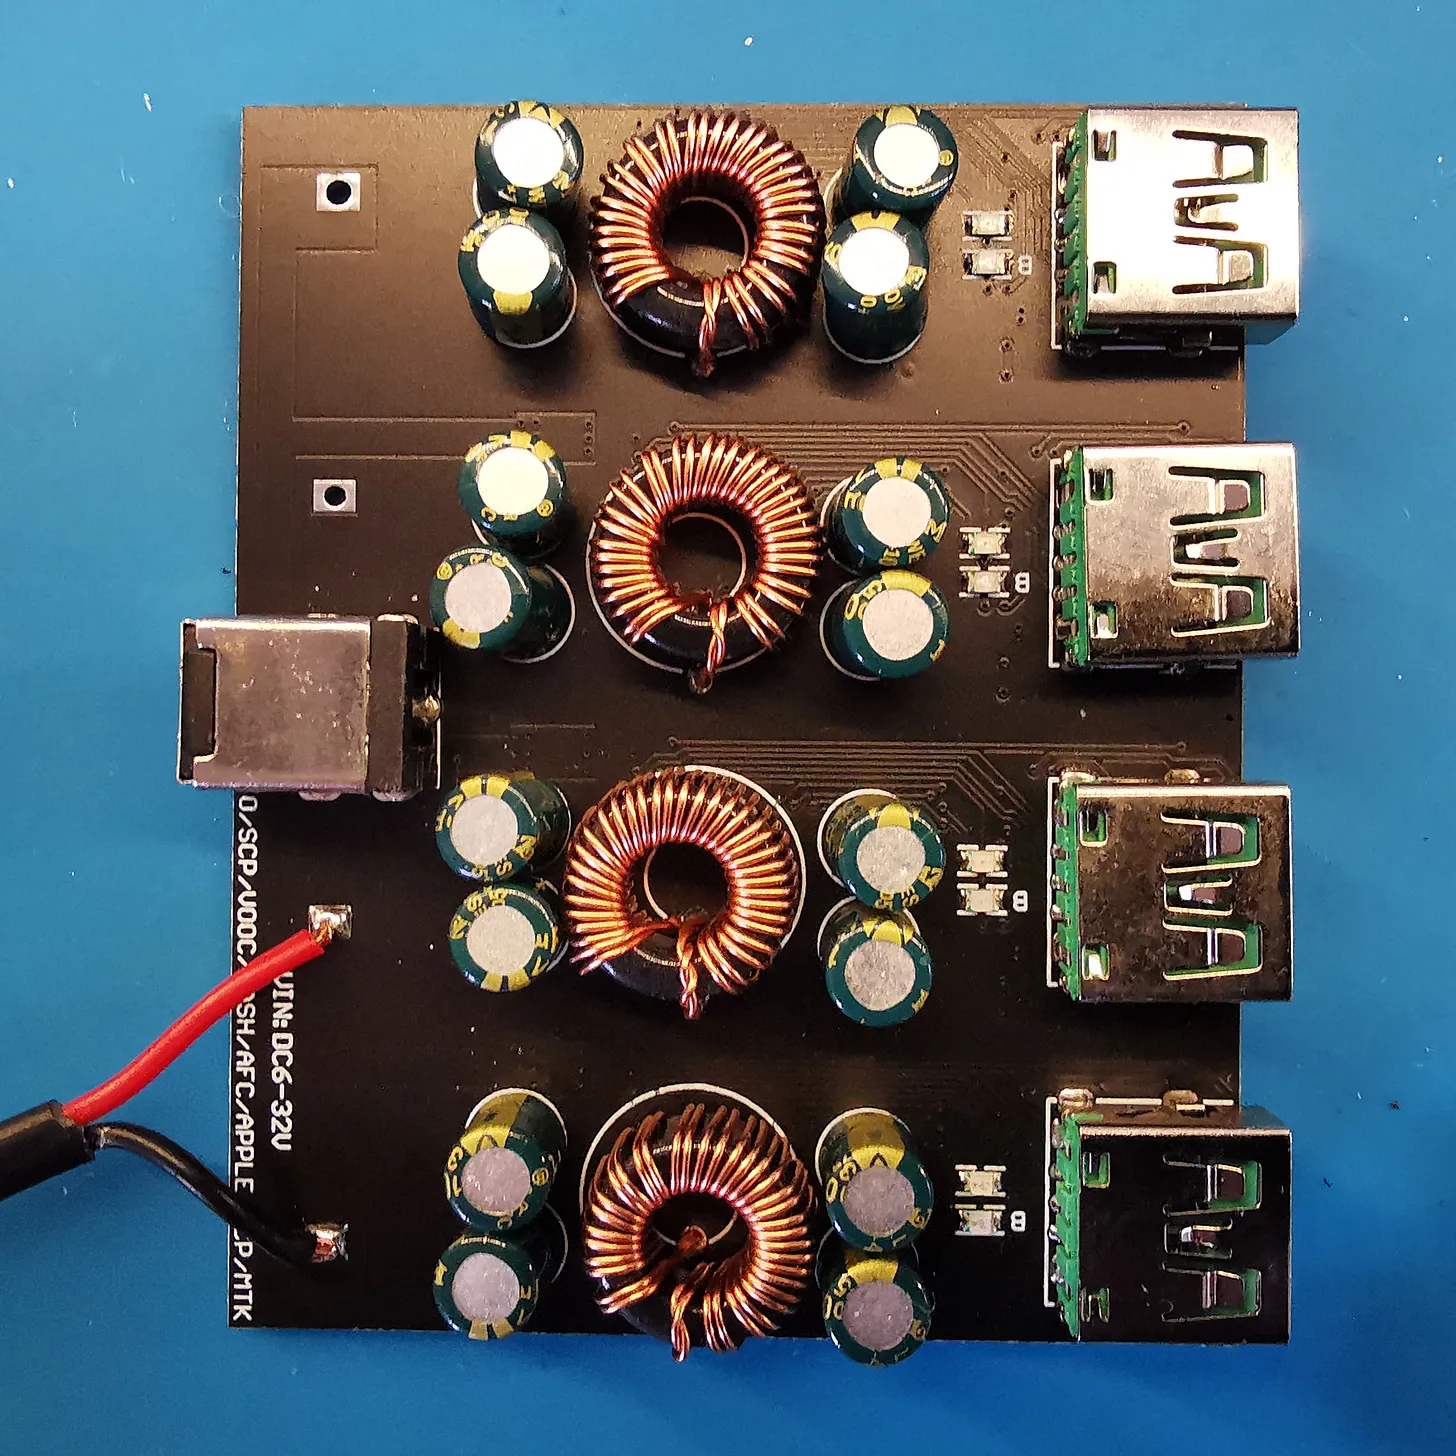
This has four standard USB sockets on the top which all support QC2 and QC3

USB-A Protocols

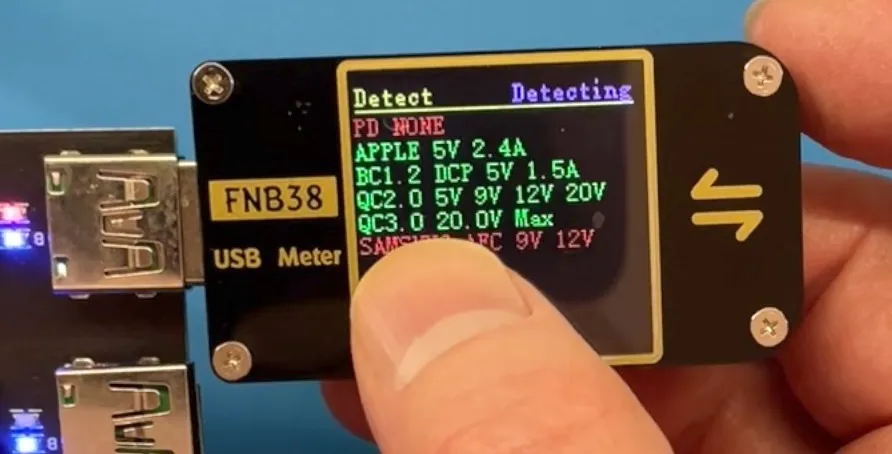
And it’s got four USB-C sockets on the bottom:

USB-C Power Board Bottom

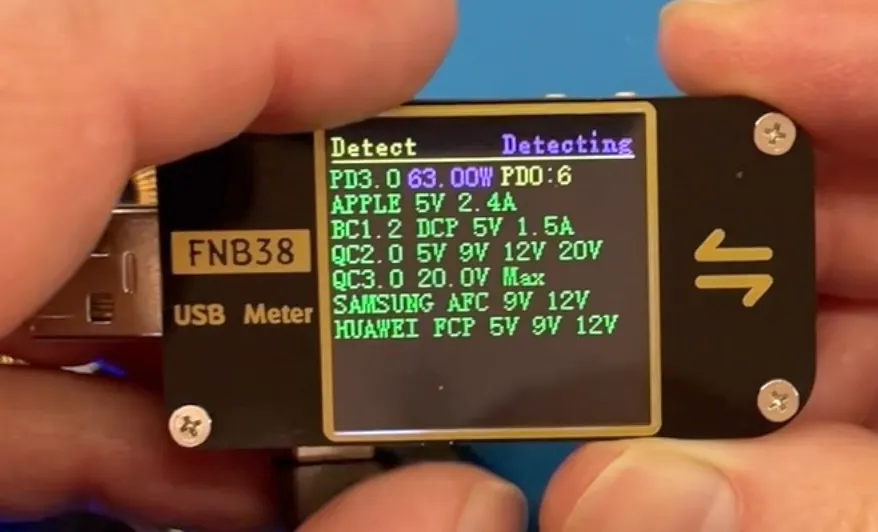
These support pretty much all the protocols you can think of!

USB-C Protocols

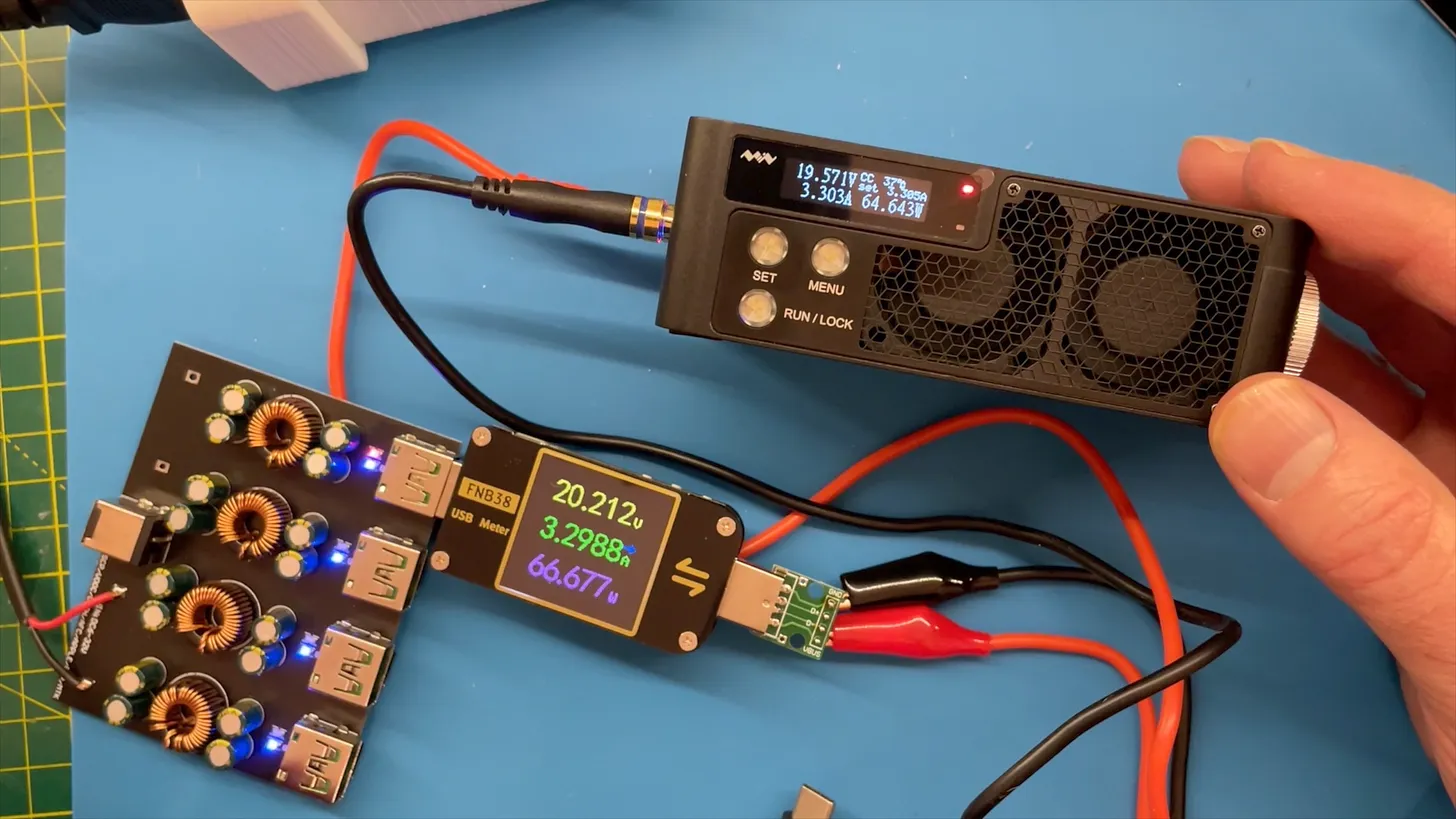
Testing out how much current the board can deliver gives us a great result - it can easily do 65 Watts!

65 Watts

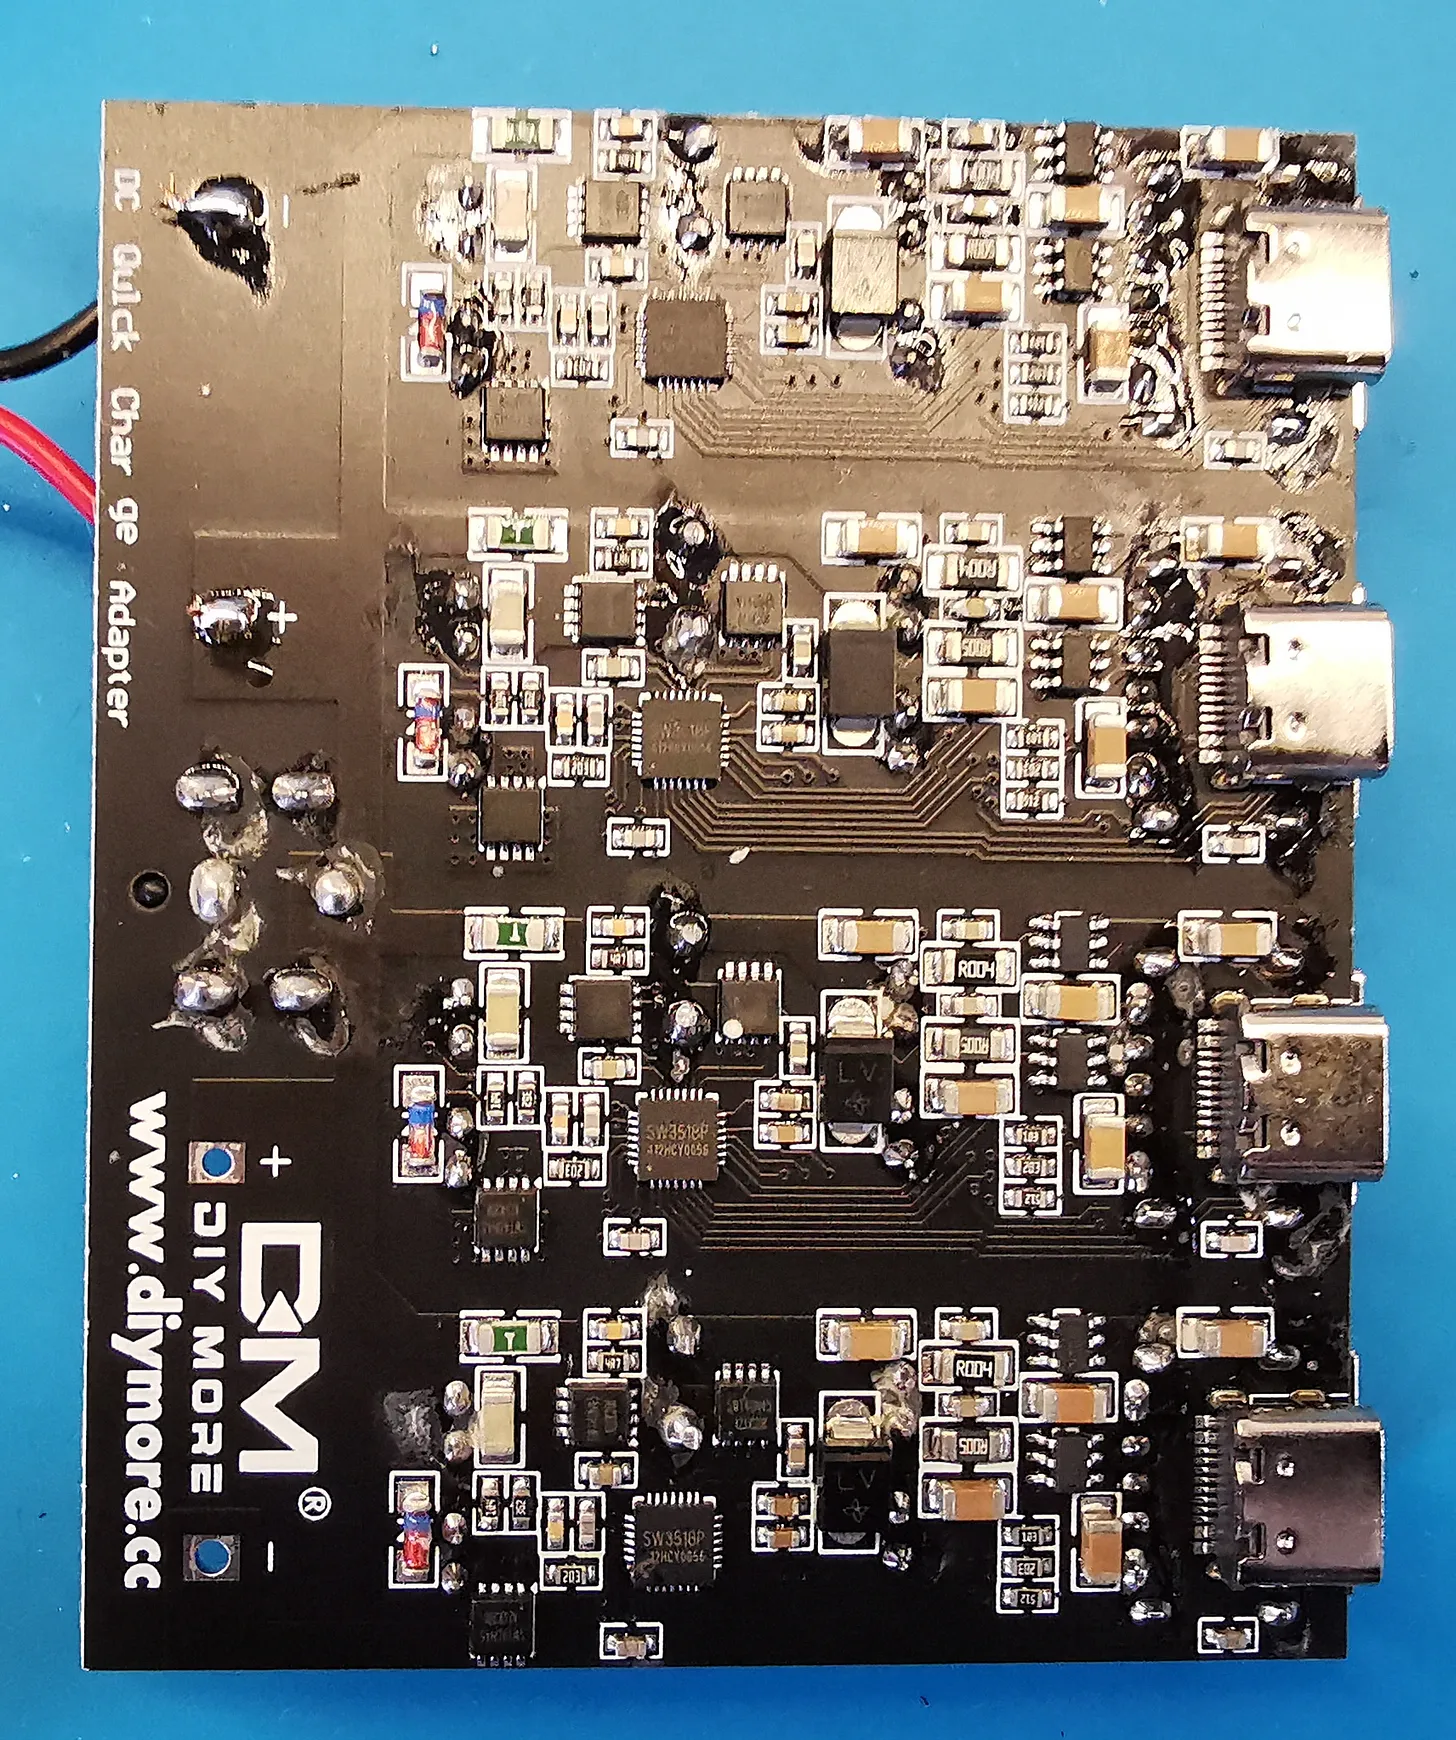
For those of you who are interested in what’s on the board, I’ve tried to capture the IC numbers in this picture:

Close Up

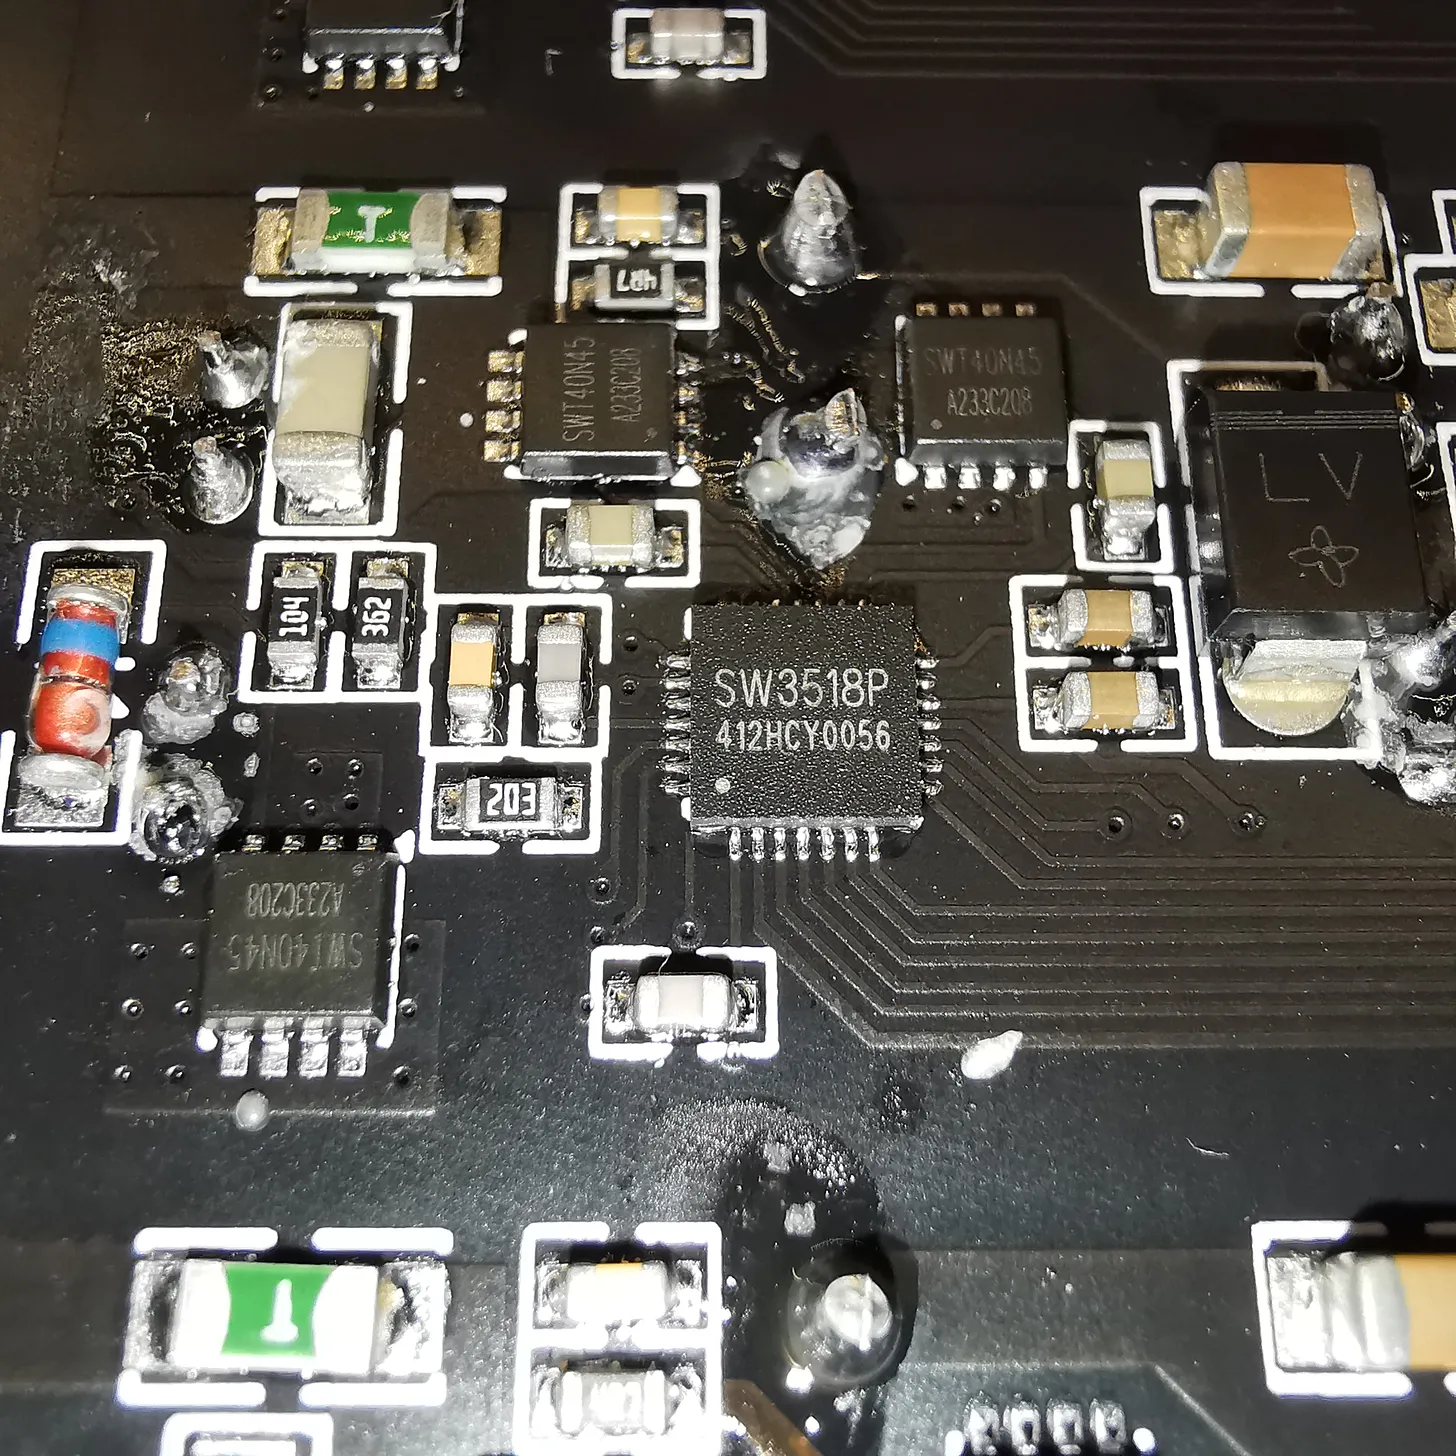
There’s a datasheet here for the chip here (it’s all in Chinese though!).

It’s pretty good though - I’ve now got 4 USB-C supplies on my bench, all of them capable of 65W of power.

#ALIEXPRESS #SOLDERING IRON #USB POWER #USB-C POWER #WORKBENCH GEAR

Related Posts

No Power? No Problem! A Wireless Pi Doom Machine - In my latest wireless charging experiments, I got my hands on a set of wireless charging PCBs and dove into testing different voltage inputs and their efficiency levels. It was interesting to realise that the 5V input managed to provide a decent efficiency of 73%, while 12V input struggled and heated the receiver board excessively. With the perks and limits of this setup explored, I took a whirl at creating a wireless Pi Doom machine. It worked like a charm! However, I quickly noticed the need to split charging and boost board into two different modules - a project to look forward to. Half the fun is getting there! Check out the video [here](https://youtu.be/glCIuOoFm7U) for more detail on the project.
Flashing the TS80P with IronOS - In this blog post, I explore the TS80P soldering iron, a tool that has been generating buzz. One of the highlights is that its firmware can be flashed with an open source system called IronOS. Here, I share my process of flashing the TS80P with IronOS and testing it out on a Raspberry Pico W. Please note, a Quick Charge or Power Delivery supporting power supply is needed for this iron. While running some tests, I observed that using a fast charger can heat this iron up twice as fast as using an Apple charger. Also, flashing the firmware is straightforward but you might need a little patience if you are using a basic USB supply.
Are my usb cables any good - Building a USB cable tester turned out to be trickier than anticipated! My first attempt with fully shielded USB sockets was foiled by design flaws and hidden solder issues. The second iteration featured more accessible sockets, yet still posed challenges. The improvement allowed us to distinguish between high-speed cables and average ones. I'm now in the midst of creating Version 3, with all connections broken out for easy testing. Stay tuned for what's next in this unexpectedly complex journey!
ESP32 TV Version 3 - In the latest board revision, I've successfully resolved some key issues, including a USB interface conflict between the USB2244 and the ESP32 and a risky battery charging mistake—no more direct USB 5V to the battery! Plus, I managed to wrap this up without any clumsy bodge wiring. I've even introduced a new feature: a microphone is now on board, setting the stage for some exciting future projects. Stay tuned for what's coming!
Minimalist Microcontroller: Building a Bare-Bones Dev Board - In a thrilling DIY endeavour, I attempted to build the most minimalist ESP32 dev board possible. Diving deep into the schematic of the ESP32 S3 WROOM module, I chopped out the non-essentials and whittled our needs down to bare bones. The experiment saw me juggling USB data lines and voltage regulators, waving goodbye to an array of capacitors and connectors and boldly embracing the simplicity of direct connections. Despite a few hitches, the miniature Frankenboard came alive, proving that sometimes less is more...at least in the world of microcontrollers.

Related Videos

Simple Multi USB-C Power Module - With my growing list of USB-C powered devices and just one cable, I found myself underpowered on my bench. My solution? Scouring the depths of AliExpress for USB-C power delivery, QC2, and QC3 step-down converters. After initially purchasing individual boards, I struck gold with an ultra-convenient 4-in-one board. Paired with a Meanwell power supply, I enjoyed pushing my new setup to its limits with the MiniWare electronic load tester. Although managing to pull a decent 65W, I'm dreaming up a 3D printed enclosure and eyeing up MiniWare's display modules for future improvements. I reckon, while I'm battling delayed PCBs and dodgy components, it's certainly a fun way to help power up my bench!
DIY Power Bank: 20,000mAh? - Discover the efficiency of a DIY 20,000mAh USB-C power bank compared to commercial versions, as a control board and lithium batteries charge up an array of devices, including a soldering iron and mini-hotplate, while also considering the project's overall cost.
Upgrade Your Soldering Game: TS80P IronOS Flash & Raspberry Pi Pico W Soldering - Upgrade your soldering skills with the TS80P soldering iron, known for its compatibility with open-source firmware IronOS. Witness how it quickly heats up when paired with different USB power supplies, and its potential to replace traditional soldering stations.
Soldering up another ESP32-S3 board and a 3in1 Oscilloscope - So in this video, I had a fun time experimenting with the cool gadgets sent over to me by Fury. I unwrapped this awesome USB soldering iron that looks quite promising and useful. The tiny solder stand, a Galium nitri power supply and a collection of soldering iron bits that they sent over were quite appreciable. The video took a spin when I introduced the novel 3in1 oscilloscope. This tool bundles an oscilloscope, a transistor tester and a signal generator. Well, that's a triple threat! I went on to test the soldering iron and it showed some remarkable results. The video ended with me trying out the oscilloscope and I must say, this little toy packs a punch! All things considered, pretty pleased with my new tech. Can't wait to get down and dirty with all the nitty-gritties these gadgets offer!
How Good Are My USB Cables? - In this video, I engage in a deeper exploration of USB testing, encountering a range of trials and tribulations along the way. First up, I attempt to test a couple of USB cables and discuss their data lines' peculiar situatedness. Then, I delve into the assembly of the PCB boards, sourced from PCBWay, which surely turned into a learning voyage than an easy sail. The first version faced challenges of misordered large-frame stencil, unseen connection problems, and even DRC errors in the submission process. Not dwell on that, I redesign and bring to table Version 2, complete with USB connectors with broken-out pins and designed for visual inspection ease. Although this version demonstrated success, soldering difficulties and bad connections persisted. Considering all the hurdles, I decide to let PCBWay handle the assembly for the next version. For future strategies, adding test points and eliminating the lithium-ion charging circuit seemed more practically viable. Peeping into version 3, testing points for all USB cable pins have been added and even an option to break out actual USB connections, all towards ensuring an improved error checking and usefulness of the assembly.
HELP SUPPORT MY WORK: If you're feeling flush then please stop by Patreon Or you can make a one off donation via ko-fi
Want to keep up to date with the latest posts and videos? Subscribe to the newsletter
Blog Logo

Chris Greening


Published

> Image

atomic14

A collection of slightly mad projects, instructive/educational videos, and generally interesting stuff. Building projects around the Arduino and ESP32 platforms - we'll be exploring AI, Computer Vision, Audio, 3D Printing - it may get a bit eclectic...

View All Posts